1.
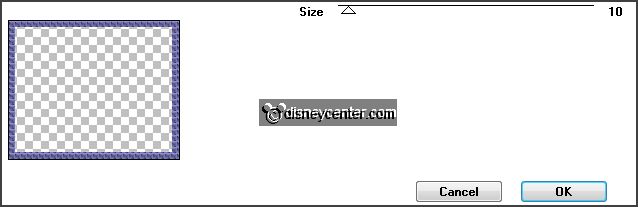
File - open new transparent image
800x650.
Set in the material palette the foreground color on
#202020.
Activate flood fill tool
– fill the layer with the foreground color.
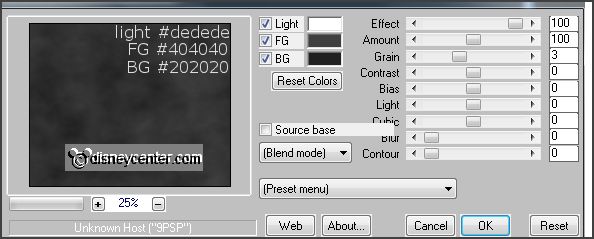
Effects – plug-ins – MuRa’s Meister – Clouds – with this setting – click
OK.
2.
Activate the tube mistedhouse –
edit - copy.
Edit - paste as a new layer on the image.
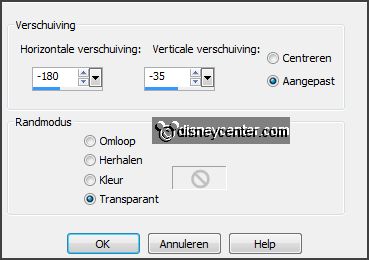
Effects – Image effects – offset –
with this setting.
3.
Activate the tube grasstrook –
edit - copy.
Edit - paste as a new layer on the image.
Effects –
Image effects – offset –
with this setting.

4.
Activate the tube michalloween2 –
edit - copy.
Edit - paste as a new layer on the image.
Activate move tool – set the tube right at the bottom.
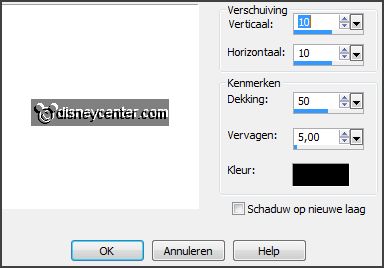
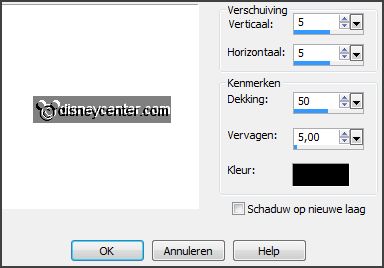
Effects- 3D Effects – drop shadow
–with
this setting.
5.
Activate the tube s-S – edit - copy.
Edit - paste as a new layer on the image.
Place the tube left at the bottom.
Effects- 3D Effects – drop shadow
–
with this setting.
6.
Activate the tube s-P –
edit - copy.
Edit - paste as a new layer on the image.
Place the
tube left near the other.
Effects- 3D Effects – drop shadow – setting is
right.
7.
Activate the tube s-O –
edit - copy.
Edit - paste as a new layer on the image.
Place the
tube left at the bottom.
Effects- 3D Effects – drop shadow – setting is
right.
8.
Activate the tube s-K –
edit - copy.
Edit - paste as a new layer on the image.
Place the
tube left at the bottom.
Effects- 3D Effects – drop shadow – setting is
right.
9.
Activate the tube s-Y –
edit - copy.
Edit - paste as a new layer on the image.
Place the
tube left at the bottom.
Effects- 3D Effects – drop shadow – setting is
right.
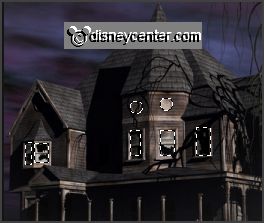
Set the tubes different in high – see example.
Lock the 4 top layers.
10.
Activate raster 2.
Activate selection tool – first rectangle – and than circle – and make a selection
as below.
Layers – duplicate – and 3 times more.
11.
Activate raster 2 again.
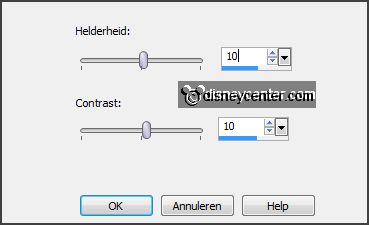
Adjust – brightness and –contrast - brightness/contrast –
with this setting.
12.
Activate copy of raster 2.
Adjust –
brightness and –contrast - brightness/contrast
– now with brightness at 20.
13.
Activate copy(2) of raster 2.
Adjust –
brightness and –contrast - brightness/contrast
– now
with brightness at 30.
14.
Activate copy(3) of raster 2.
Adjust –
brightness and –contrast - brightness/contrast
– now
with brightness at 40.
15.
Activate copy(4) of raster 2.
Adjust –
brightness and –contrast - brightness/contrast
– now
with brightness at 50.
Selections – select none.
Lock the
4 copy layers.
16.
Activate the tube spooky –
edit - copy.
Edit - paste as a new layer on the image.
Place this tube somewhere at the house.
17.
Layers –
duplicate – and 3 times more.
Move this ar different place at the house. You can mirror resize them also.
Lock the
4 copy layers.
18.
Activate the bottom layer.
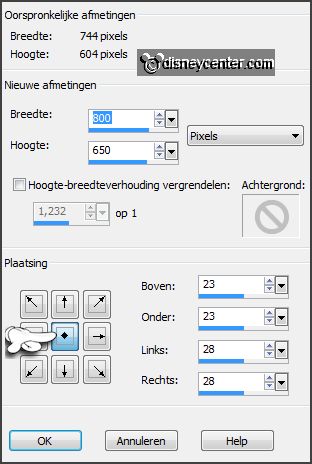
Image – resize 93% - all layers checked.
Image – canvas size –
with this setting.
19.
Activate the magic wand – with setting below – and select the transparent
border.

Set in the material palette the foreground color
at # #47466c.
20.
Layers – new raster layer.
Fill the selection with the foreground color.
Effects – plug-ins – Filter Factory Gallery A – Holiday in Egypt –
with this setting – click OK.
21.
Selections – invert.
Selections – modify – select selection borders –
with this setting.
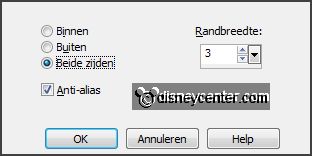
Selections – select none.
Effects- 3D Effects – drop shadow – setting is right.
Repeat the drop shadow – now with vert. and horz. at -5.
22.
Activate the top layer.
Layers – new raster layer – put your watermark into the image.
Image – resize – 85% - all layers checked.
23.
Now we make the animation.
Watch out, because you must open and lock many
different layers.
Activate the bottom
layer – edit – copy merged.
Open Animation Shop – paste as a new animation.
24.
Back to PSP.
Lock raster 2 and 10 and open copy on raster 2, raster 6 and copy of
raster 10.
In AS – paste after active frame.
25.
Back to PSP.
Lock copy of raster 2 and 10 and open copy(2) of raster 2, raster 7 and copy(2)
of raster 10.
In AS – paste
after active frame.
26.
Back to PSP.
Lock copy(2) of raster 2 and 10 and open
copy(3) of raster 2, raster 8 and copy(3) of raster 10.
In AS – paste
after active frame.
27.
Back to PSP.
Lock copy(3) of raster 2 and 10 and open
copy(4) of raster 2, raster 9
and copy(4) of raster 10.
In AS – paste
after active frame.
28.
Animations – Frame
properties – at 30 and the last
frame at 100.
File – save as – give name
– click 3 times at next and than at finish.
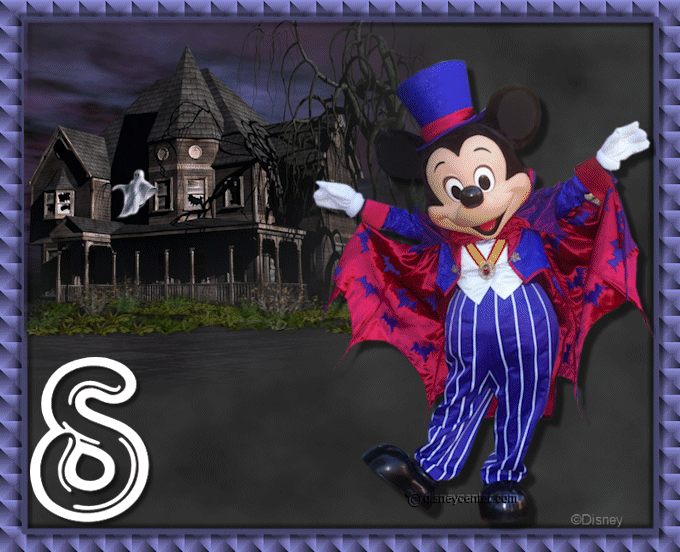
Ready is the tag
I hope you like this tutorial.
greetings Emmy
Tested by Nelly