
This
Tutorial is copyrighted to the Tutorial Writer, © Emmy Kruyswijk October 2011.
This Tutorial
may
not be forwarded, shared or otherwise placed on any Web Site or group without written
permission from
Emmy Kruyswijk
Do you want to link my lessons?
Please send
me a mail.
Materials:

2 tubes from reveries, 1 tube
unknown,1 tube from Tina 2
tube, 1 misted tube all made by me, Animatie Shop.
Filters: FM Tile Tools -
Blend Emboss, Filter Factory (Gallery) F - Guess What?.
download here.
Before you begins........
Plug-ins : Install first your plug-ins in PSP, before you open
PSP, put the plug-ins in the folder plug-ins.
Open the
tubes in PSP
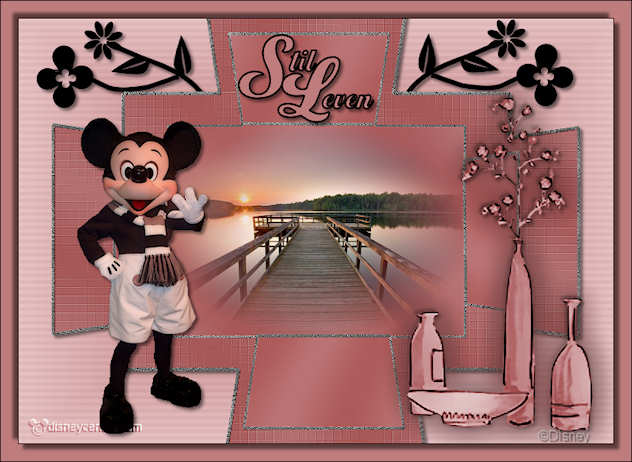
Still Live
Foreground color #deb9bb and
background color
#b36666
1.
Open new transparent image 700x500.
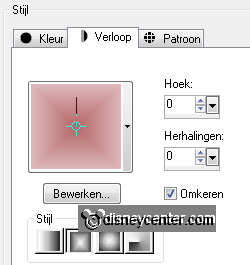
Fill this rectangle with gradient - with this setting.
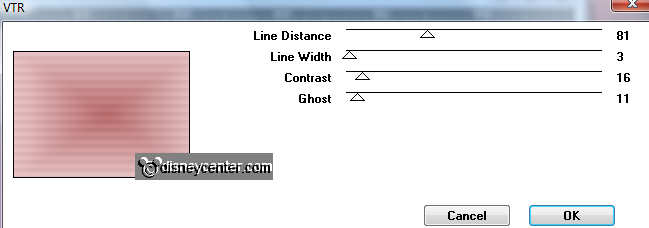
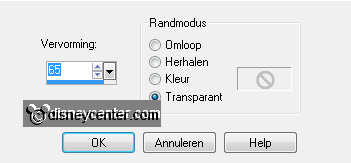
Effects - Penta.com -VTR - with this setting.
2.
New layer - set the foreground and background to # a95353
# # be7c7c
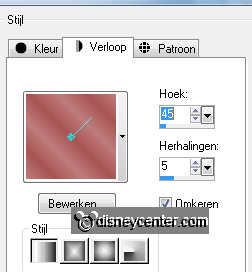
Fill it with linear gradient - with this setting.
Adjust - Blur - Gaussian Blur - radius 40.
Image - Resize 65% - all layers unchecked.
Duplicate this layer.
3.
Effects - Geometric Effects - horizontal perspective - with this
setting
Slide to the left - 40 pixels from the side.
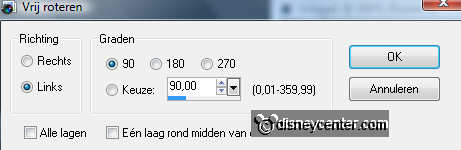
Duplicate this layer - image - free rotate - with this setting.
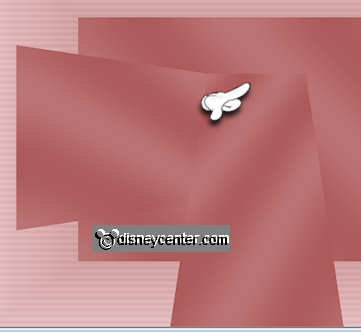
Slide it as shown below.
Layers - merge - merge down.
4.
Duplicate this layer - image - mirror - image - flip.
Layers - merge - merge down.
Layers - arrange - move down.
Layers - merge - merge down.
5.
Duplicate this layer - image - resize 77% - all layers
unchecked.
Lock the top layer and make the underneath layer active.
Effects - Distortion Effects - Pixelate - with this setting.
Effects - Edge Effects - Enhance.
Effects - FM Tile Tools - Blend Emboss - default setting.
6.
Selections - select all - floating-selections - selections
- not floating.
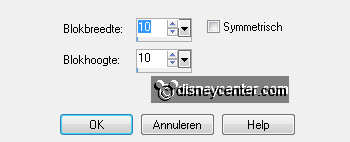
Selections - modify - select selection borders - with this setting.
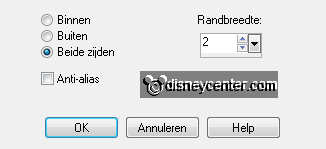
Fill the selection with the silver pattern - angle 0 - 100 scale.
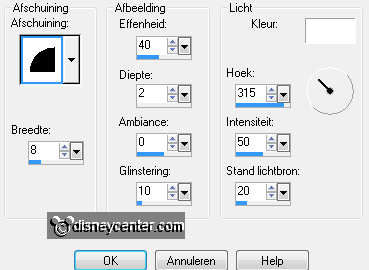
Effects - 3D Effects - Inner Bevel - with this setting.
Selections - select none.
7.
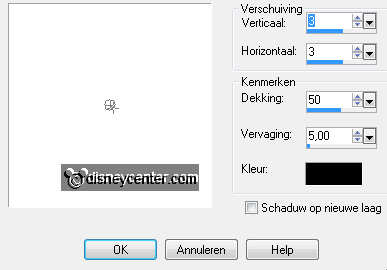
Effects - 3D Effects - drop shadow - with this setting.
Open the top layer and make it active.
Selections - select all - floating-selections - selections - not
floating.
Selections - modify - select selection borders - with this setting.
Fill the selection with the silver pattern - angle 0 - 100 scale.
Effects - 3D Effects - Inner Bevel - with the same setting as in
point 6.
Effects - 3D Effects - Drop Shadow - with the same setting as above.
Selections - select none.
8.
Go to pen tool - point to point - line width 4. Silver Pattern
as foreground.

New raster layer.
Draw a line as below.
In the end then left two times. Keep up all 4 edges. see example.
Apply the same inner bevel as in step 6.
Layers - merge - merge down.
9.
Copy doodleEmmy and paste as a new layer to the image.
Place this left to the top.
Layers - arrange - move and again.
Make a selection to the things of the doodle - see below - click on
the delete button.
Selections - select none.
Selections - select none.
10.
Duplicate this layer - image - mirror.
Move it so that the same will appear if the other side.
Also pull the tabs off here.
Layers - merge - merge down.
Apply the same drop shadow as in step 6.
11.
Make the top layer active - new raster layer.
Go to tool selection - selection - rectangle.
Make a selection in the large rectangle in the silver.
Lunapaisagem290 open - copy raster1 group and paste into selection.
Selections - select none.
12.
Copy tube-by-Stephane and paste as new layer to the image.
Place the bottom right.
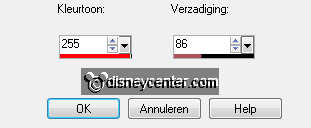
Adjust - hue and saturation - with this setting.
Give the same drop shadow as in step 7.
Repeat the drop shadow, now -3.
13.
Copy
Micsjaal and paste as new layer to the image.
Image - Mirror.
Image - Resize 90% - all layers unchecked.
Give the same drop shadow as in step 7.
14.
Copy and paste word art as a new layer to the image.
Put it in the top center.
New layer - put your watermark in the picture.
Image - add borders 1 pixel - symmetric - color black.
Image - add border 20 pixels - symmetric - color # be7c7c.
15.
Selections - select all - selections - modify - contract 20.
Effects - 3D Effects - Drop Shadow -with this setting.
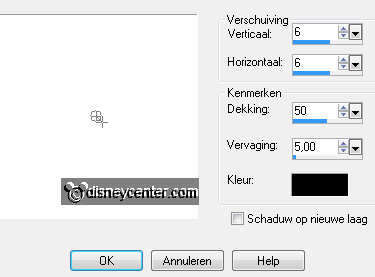
Repeat the drop shadow now -6.
Selections - select none.
Image - add borders 1 pixel - symmetric - color black.
Image - resize 85% - all layers checked.
File - Export - JPEG optimize.
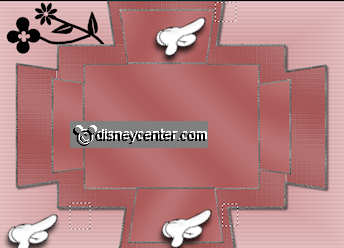
Ready is the tag
I hope you like this tutorial.
greetings Emmy,
Tested by Bep

Tutorial written
24-10-2011
