|

This
Tutorial is copyrighted to the Tutorial Writer, © Emmy Kruyswijk
06-02-2013.
This Tutorial
may
not be forwarded, shared or otherwise placed on any Web Site or group without written
permission from
Emmy Kruyswijk.
Many of the material are made by me.
Please respect my work and don't change the file names.
At all Disney creations must be copyrighted.
Do you want to link my lessons?
Please send
me a mail.
Needing:
4
tubes, 1 word-art, 1 selection - made by me.
1 tube, 1 gold pattern - unknown.
Plug-ins: I.C.NET Software - Filters Unlimited 2.0 -
&Bkg Designer sf10 I - 4 way Average,
I.C.NET Software Filters
Unlimited 2.0 - &Bkg Designer sf10 II - Emboss Crinkle, Tramages - Tow the Line,
Download here
Animatie Shop
Before you begins.......
Open the tubes, images and word-art in PSP,
Set the plug-ins in the folder
plug-ins, the selection in the folder selections and the mask in the folder masks.
You can import the plug-in Tramages also in
Filters Unlimited.
Material

St Patrick

1.
File - open new transparent image 700x500.
Set in the material palette the foreground color on #ae4e14
and the background color on #92bd76.
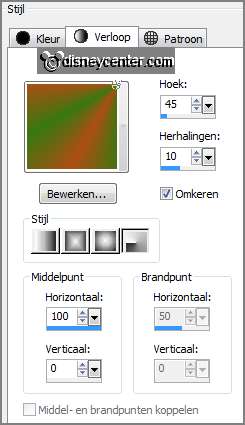
Make from the foreground a gradient radial - with this setting.
2.
Activate flood fill tool - fill the layer with the gradient.
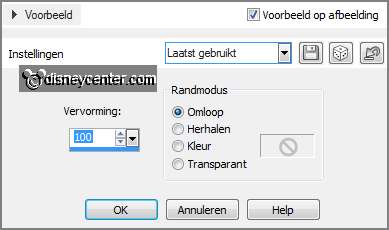
Effects - Geometrics effects - Perspective Vertical -
with this setting.
3.
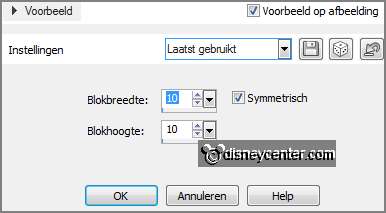
Effects - Distortion effects - pixelate -
with this setting.
Effects - Edge effects - enhance.
Layers - duplicate.
Image - flip.
4.
Set in the layer palette the opacity of this layer to 50.
Layers - merge - merge down.
Effects - Edge effects - enhance.
Effects - Image effects - seamless tiling - default setting.
5.
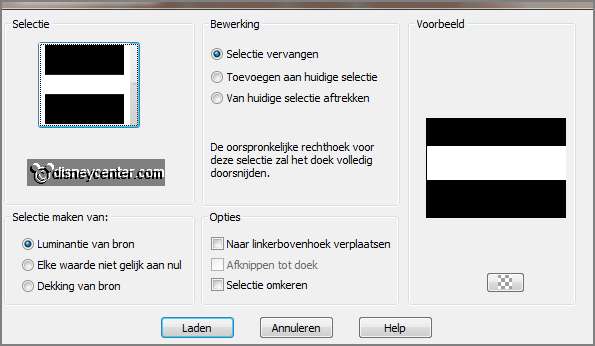
Selections - load/save selection - load selection from disk - look Emmystpatrick
-
with this setting.
Layers - new raster layer.
Fill the selection with the background color.
Selections - select none.
6.
Effects - plug-ins - Tramages - Tow the Line -
with this setting - click
OK.

Effects - plug-ins - I.C.NET Software Filters
Unlimited 2.0 - &Bkg Designer sf10 I - 4 way Average -
with this setting - click Apply.
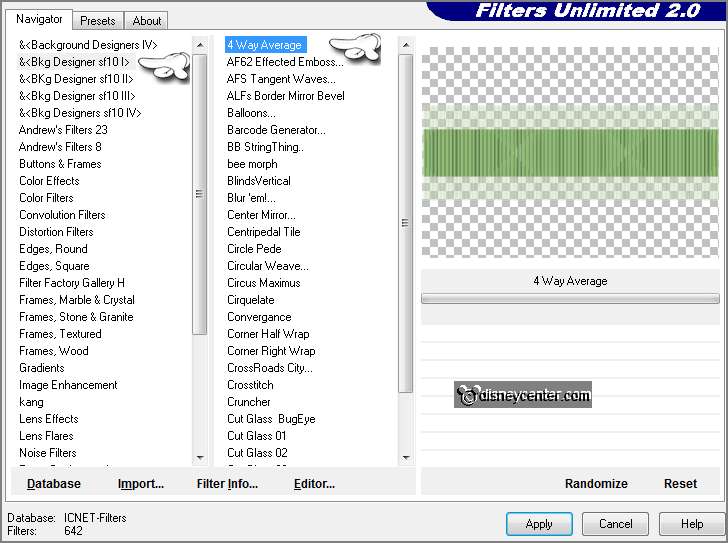
Effects - plug-ins - I.C.NET Software Filters
Unlimited 2.0 - &Bkg Designer sf10 II - Emboss Crinkle -
with this setting - click Apply.
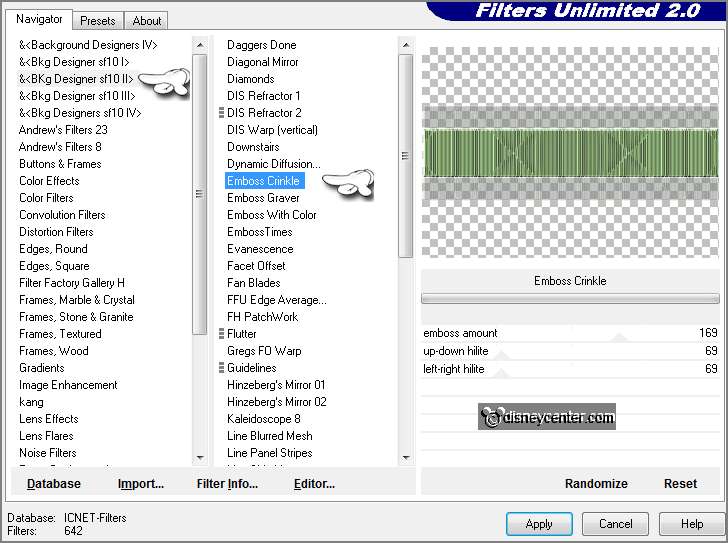
Effects - Image effects - seamless tiling -
default setting.
7.
Layers - duplicate.
Image - free rotate -
with this setting.

Set in the layer palette the opacity of this layer
to 50.
Layers - merge - merge down.
8.
Activate the tube Emmygolfrand - edit - copy.
Edit - paste as a new layer on the image.
Image - free rotate -
with this setting.

Effects - Image effects - offset -
with this setting.
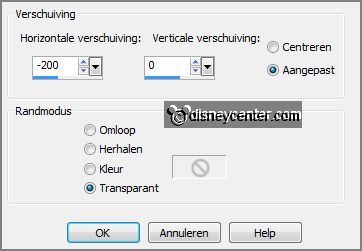
9.
Layers - duplicate.
Image - mirror.
Layers - merge - merge down.
Effects - 3D Effects - drop shadow -
with this setting.
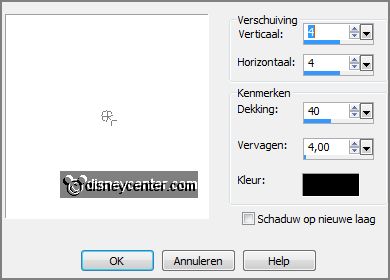
10.
Change in the material palette the gradient in pattern - gold - angle 0 - scale
100.
Layers - new raster layer - fill the layer with the gold pattern.
Selections - select all.
11.
Selections - modify - contract 5 pixels - click at the delete key.
Selections - invert.
Effects - 3D Effects - Inner Bevel -
with this setting.
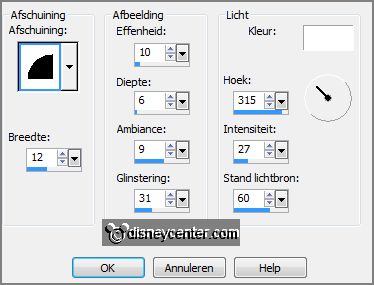
Selections - select none.
12.
Activate the tube Emmypatrickpot - edit - copy.
Edit - paste as a new layer on the image
Activate move tool and move the tube left at the bottom.
Effects - 3D Effects - drop shadow -
setting is right.
13.
Activate thee tube Emmyrainbow - edit - copy.
Edit - paste as a new layer on the image.
Image - free rotate -
with this setting.

14.
Effects - Image effects - offset -
with this setting.
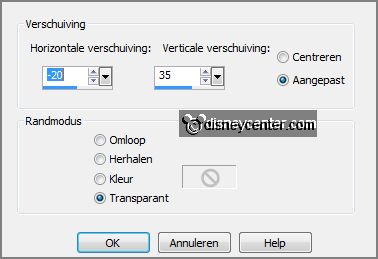
Layers - duplicate - and 1 more time.
Make raster 6 active.
15.
Adjust - add/remove noise - add noise -
with this setting.
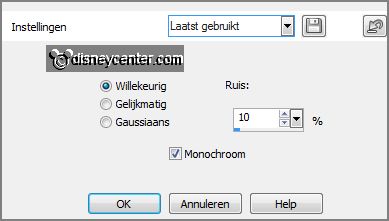
Make copy of raster 6 active - repeat the noise
now to 15.
Make copy(2) of raster 6 active - repeat the noise now to 20.
Lock the 2 top layers.
16.
Activate the tube micpaddy - edit - copy.
Edit - paste as a new layer on the image.
Effects - Image effects - offset -
with this setting.
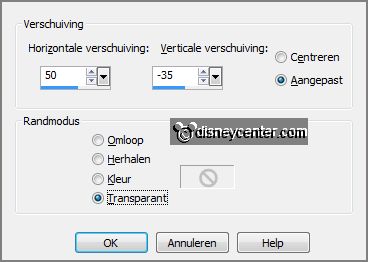
Effects - 3D Effects - drop shadow - setting is
right.
17.
Activate the tube Emmypatrickrand - edit - copy.
Edit - paste as a new layer on the image.
Objects - Align - right.
Effects - 3D Effects - drop shadow - setting is right.
18.
Activate the word-art-stpatrick - edit - copy.
Edit - paste as a new layer on the image.
Place this to the left at the top.
19.
Layers - new raster layer - put your watermark into the image.
Make the bottom layer active.
Edit - copy merged.
20.
Open Animatie Shop - paste as a new animation.
Back to PSP - lock raster 6 and open copy of raster 6.
Edit - copy merged.
21.
In AS - paste after active frame.
Back to PSP - lock copy of raster 6 and open copy(2) of raster 6.
Edit - copy merged.
22.
In AS - paste after active frame (Be sure the last frame is selected.)
File - save as - give name - click
3 times at next and than at finish.
Ready is the tag
I hope you like this tutorial.
greetings Emmy
Tested by Nelly

tutorial written 06-02-2013.
|