1.
File - open new transparent image 800x600.
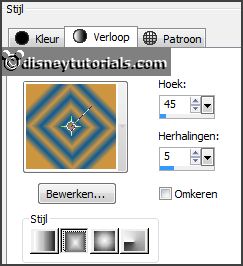
Set in the material palette the foreground color at light #cd9540
and the
background at a dark color #0e5a94.
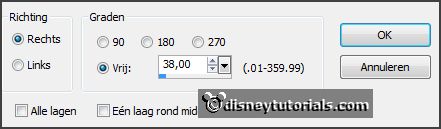
Make from the foreground a gradient rectangle -
with this setting.
Activate flood fill tool -
fill the layer with the gradient.
2.
Layers - duplicate.
Image - mirror.
Set in the layer palette the opacity to 50.
Layers - merge - merge down.
Effects - Edge effects - enhance more - and 1 more time.
3.
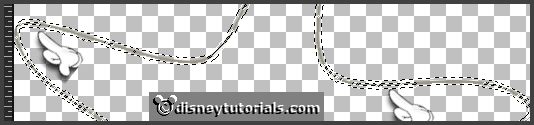
Activate the template hpd_Template 18 - shift+D- and close the original.
Lock all layers and open layer1.
Edit - copy.
Edit - paste as a new image.
4.
Activate the magic wand -
with setting below - select the border.

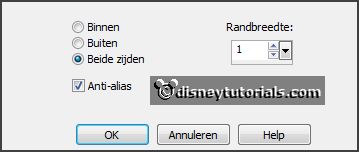
Selections - modify - select selected borders -
with this setting.
If you see this - as below - click than in the selection - and do again - select
selected borders -
than it is properly good.
Fill the selection with the background color and do him again with brush-size 15.
5.
Edit - copy.
Edit - paste as a new layer on the image.
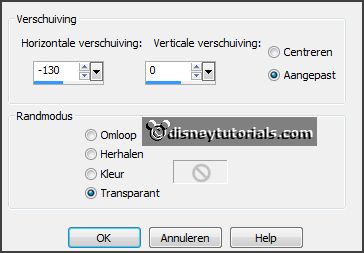
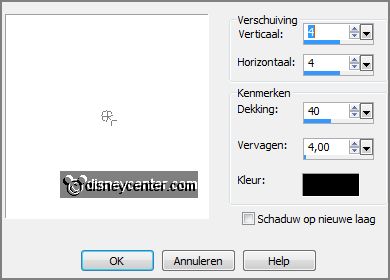
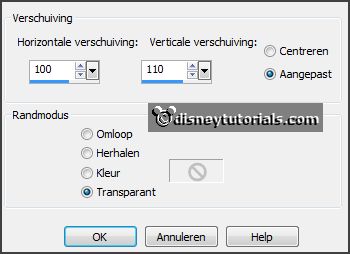
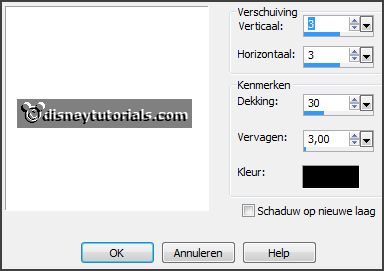
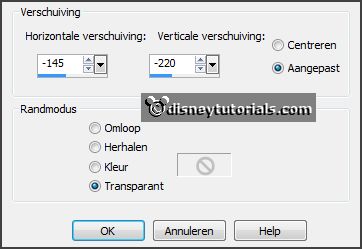
Effects - Image effects - offset -
with this setting.
Lock the bottom layer.
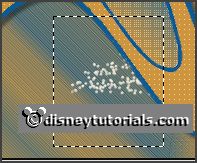
Select with the magic wand in the middle of raster 2.
Selections - modify - expand 3 pixels.
6.
Layers - new raster layer.
Set the foreground back to color.
Fill the selection with the foreground color.
Selections - select none.
Layers - arrange - move down.
Effects - plug-ins - Penta.com - Color
Dot -
with this setting - click
OK.
Lock this layer.
7.
Activate raster 2.
Layers - duplicate.
Image - resize 75% - all layers not checked.
Activate move tool - put this in the middle - see example.
Select with the magic wand in the middle of raster 2.
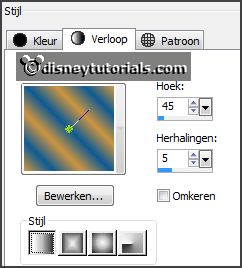
Change the foreground in gradient linear -
with this setting.
8.
Layers - new raster layer.
Fill the selection with the gradient.
Selections - select none.
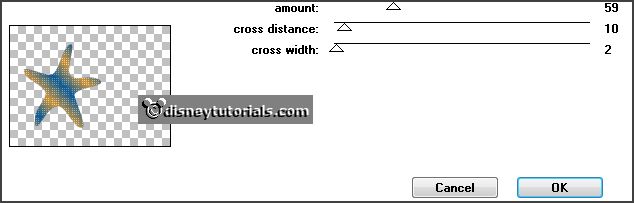
Effects - plug-ins - Penta.com - Dot
and Cross - with this setting -
click OK.
Layers - arrange - move down.
9.
Layers - merge - merge down and 2 more
times.
Open the 2 layers again.
Effects - 3D Effects - drop shadow -
with this setting.
Layers - duplicate.
10.
Back to the template -close layer1 and open layer7 and activate this.
Edit - copy.
Edit - paste as a new image.
Select with the magic wand the circle.
Fill the selection with the background color.
11.
Effects - plug-ins - Penta.com - Dot and Cross - setting is right -
click OK.
Selections - select none.
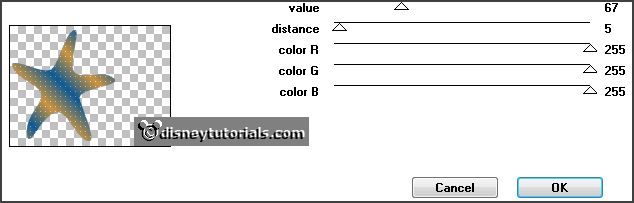
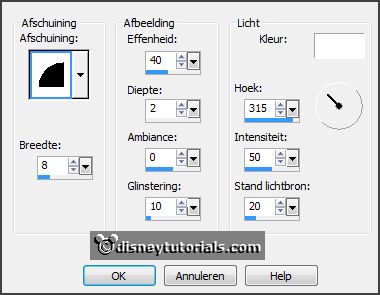
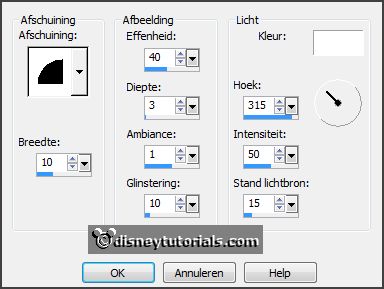
Effects - 3D Effects - Inner Bevel -
with this setting.
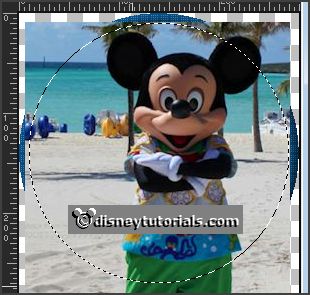
Select with the magic wand in the middle.
12.
Activate the image micstrand - Edit - copy.
Edit - paste as a new layer on the image.
Place as below.
Selections - invert - click at the delete key.
Selections - select none.
Layers - arrange - move down.
Activate raster 1.
Layers - merge - merge down.
13.
Edit - copy.
Edit - paste as a new layer on the image.
Effects - Image effects - offset -
with this setting.
Effects - 3D Effects - drop shadow - setting is right.
14.
Back to the template - close layer7 and
open layer8 and activate this.
Edit - copy.
Edit - paste as a new image.
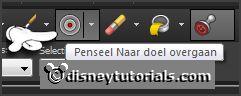
Activate Change to Target tool - see below.
15.
Turn in the material palette the colors.
Go with size 15 over the text.
Layers - duplicate.
Layers - merge - merge down.
16.
Edit - copy.
Edit - paste as a new layer on the image.
Effects - Image effects - offset -
setting is right.
Effects - 3D Effects - Inner Bevel -
with this setting.
Effects - 3D Effects - drop shadow -
with this setting.
Layers - merge - merge down.
17.
Activate the tube mzimm_vintagesummer_sandoverlay1 - edit
- copy.
Edit - paste as a new layer on the image.
Place this right at the bottom.
Layers - duplicate.
Move a bite with this layer.
Layers - merge - merge down.
Layers - arrange - move down - under raster 3.
Activate selection tool - rectangle - and make a selection as below
- click at the delete key.
Selections - select none.
18.
Activate the top layer.
Activate the tube minniestrand - edit - copy.
Edit - paste as a new layer on the image.
Place this on the sand - see example.
19.
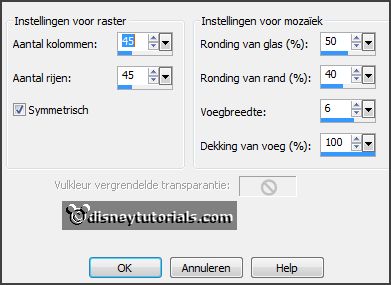
Layers - duplicate.
Effects - Texture effects - Mosaic Glass -
with this setting.
Layers - arrange - move down - under raster 2.
Stay at this layer - lock raster 5.
20.
Activate eraser tool - round - size 15 - and erase over the part of the text -
right under.
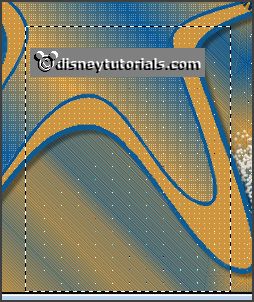
Activate selection tool - rectangle - and make a selection as below
- click at the delete key.
Activate the top layer.
Effects - 3D Effects - drop shadow - with this setting.
21.
Activate the tube Susanne DesignsSummerT_el62 -
edit - copy.
Edit - paste as a new layer on the image.
Place this left at the top - see example.
Effects - 3D Effects - Inner Bevel -
setting is right.
Effects - 3D Effects - drop shadow - setting
is right.
22.
Back to the template and close layer8
open layer9 and activate this.
Edit - copy.
Edit - paste as a new layer on the image.
Effects - Image effects - offset -
with this setting.
Selections - select all - float - defloat.
Turn in the material palette the colors.
Fill the selection with the background color
(0e5a94) with paint brush size 14.
Selections - select none.
23.
Layers - duplicate.
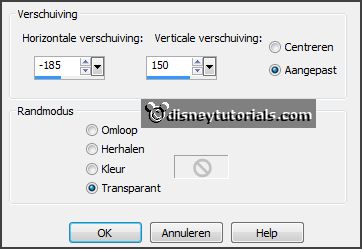
Effects - Image effects - offset -
with this setting.
Layers - merge - merge down.
Effects - 3D Effects - drop shadow - setting
is right.
24.
Back to the template and close layer9 open
layer6 and activate this.
Edit - copy.
Edit - paste as a new layer on the image.
Place this in the middle of raster 3.
Select with the magic wand the flower (raster8).
Fill the selection with the background color.
Selections - modify - contract 3 pixels.
Set the foreground back to color.
Fill the selection with the foreground color.
Selections - select none.
Effects - 3D Effects - drop shadow - setting
is right.
25.
Back to the template and close layer6 open
layer10 and activate this.
Edit - copy.
Edit - paste as a new layer on the image.
Place this in the middle at the other.
26.
Select with the magic wand the flower.
Fill the selection with the background color.
Selections - select none.
Effects - 3D Effects - drop shadow - setting
is right.
Layers - merge - merge down.
27.
Layers - duplicate.
Image - free rotate -
with this setting.
Lock this layer.
28.
Back to the template -
edit - copy.
Edit - paste as a new layer on the image.
Place this right at the top - see example.
Select with the magic wand the flower (raster9).
Fill the selection with the background color.
Selections - select none.
29.
Effects - 3D Effects - Inner Bevel -
with this setting.
Edit - paste as a new layer on the image (stays in memory).
Image - resize 75% - all layers not checked.
Place this angle under the other - see example.
30.
Select with the magic wand the flower (raster10).
Fill the selection with the foreground color.
Selections - select none.
Effects - 3D Effects - Inner Bevel -
setting is right.
Layers - merge - merge down.
Effects - 3D Effects - drop shadow - setting
is right.
Layers - duplicate.
31.
Activate raster 3.
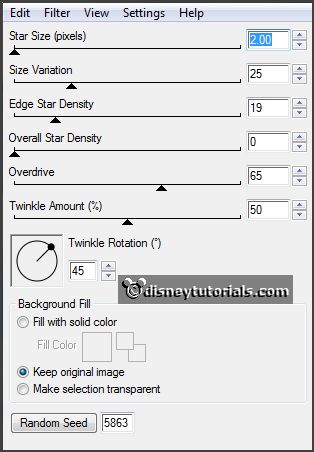
Effects - plug-ins - Alien Skin Xenoflex 2.0 - Constellation -
with this setting - click OK.
Activate copy of raster 3.
Repeat Constellation - click on Random Seed - click OK.
Lock this layer.
32.
Activate raster 9.
Repeat Constellation - click on Random Seed -
click OK.
Activate copy of raster 9.
Repeat Constellation - click on Random Seed -
click OK.
Lock this layer.
33.
Layers - new raster layer.
Selections - select all.
Fill the selection with the background color.
Selection modify - contract 5 pixels - click at the delete key.
34.
Selections - invert.
Effects - plug-ins - Penta.com - Dot and Cross -
setting is right - click OK.
Effects - 3D Effects - drop shadow - setting is right.
Repeat the drop shadow - now with vert. and horz. to -4.
Layers - new raster layer - put your
watermark into the image.
Image - resize 85% - all layers checked.
35.
Activate the bottom layer.
Edit - copy merged.
Open Animation Shop - edit - paste as a new animation.
36.
Back in PSP.
Lock raster 3, 8 and 9 open copy of raster 3, 8 and 9.
Edit - copy merged.
In AS - paste after active frame.
37.
File - save as - give name - click 3 times at next and than finish.