Thinking of....
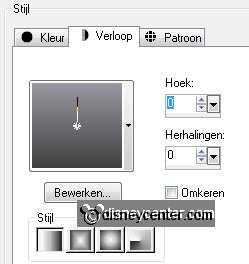
Foreground color #404040 and background color #98989f
1.
Open new transparent image 600x450.
Fill this with gradient linear - with this setting.
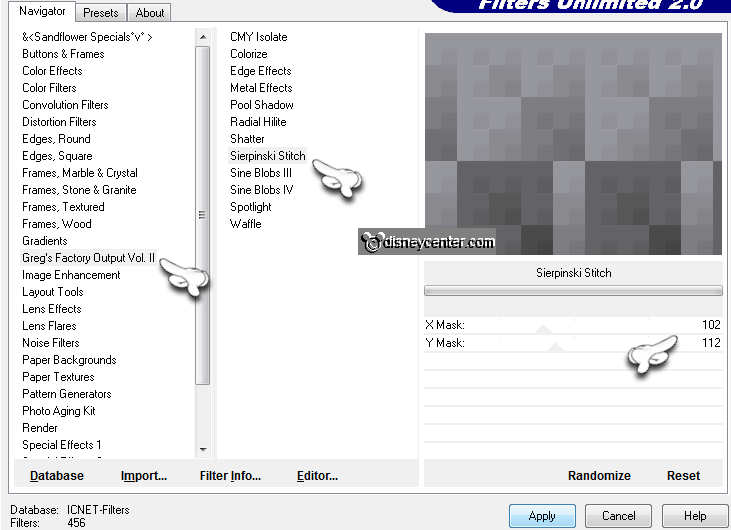
Effects - Filter Unlimited 2.0 - Greg's Factory Output Vol.II - Sierpinski
Stitch - with this setting..
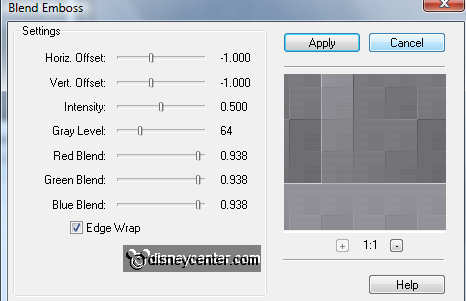
Effects - FM Tile Tools - Blend Emboss - with this setting.
2.
New raster layer -set the background color at #8a0000 - fill this layer with
the color.
Layers - Load /Save mask - load mask from disk - look for mask 174a (38)
with this setting..
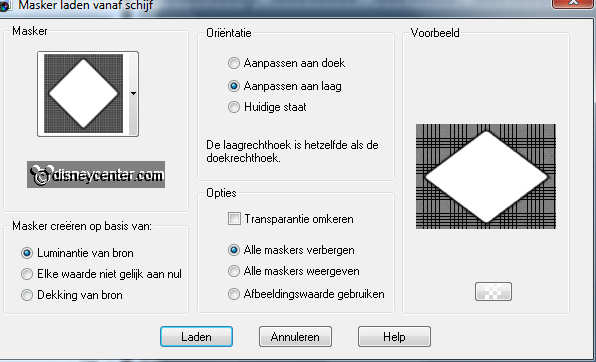
Layers -merge - merge group.
3.
Selections - Load/save selection - load selection from disk - look for
Emmy rood. - with this setting.
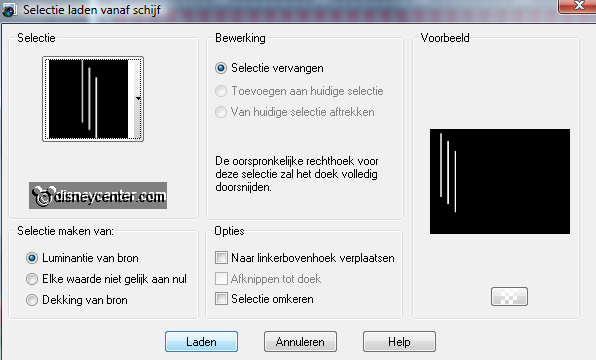
New raster layer - fill the selection with the foreground color.
Selections - select none.
4.
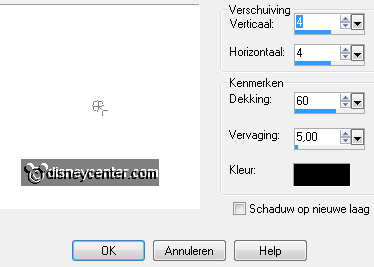
Effects - 3D Effects - drop shadow - with this setting.
Duplicate this layer - image - mirror.
Go to selection tool - selection - rounded rectangle.
Pull a rectangle of 300x35 and place this in the middle at the top.
About 20 pixels from the top.
5.
New raster layer - fill this with the foreground color.
Selections - select none.
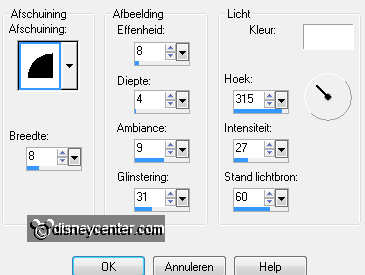
Effects - 3D Effects - Inner Bevel - with this setting.
Duplicate this layer - image - mirror.
6.
Copy pspc19_flowers_tulipsinrain and paste as a new layer.
Image - resize 50% - all layers not checked.
Place this in the left corner at the bottom.
Give the same drop shadow as in point 4.
Duplicate this layer - image - mirror.
7.
Copy jwc_minnie_laying_down and paste as a new layer.
CopyMickey-304 and paste as a new layer.
Image - resize 125% - all layers not checked.
Set the blend mode of this layer at Multiply and the opacity at 15.
Layers - arrange - move down.
Gum ear off - see below.

8.
Make the top layer active.
Give the same drop shadow as in point 4.
Go to text tool - font CinnamonRollfrosted - size 30 - lock the foreground
color.

And write - Thinking of....... Place this at the top rectangle.
Write - you - Place this at the bottom rectangle.
Give both the same drop shadow as in point 4.
9.
Image - add border 20 - foreground color.
Select the border with the magic wand.
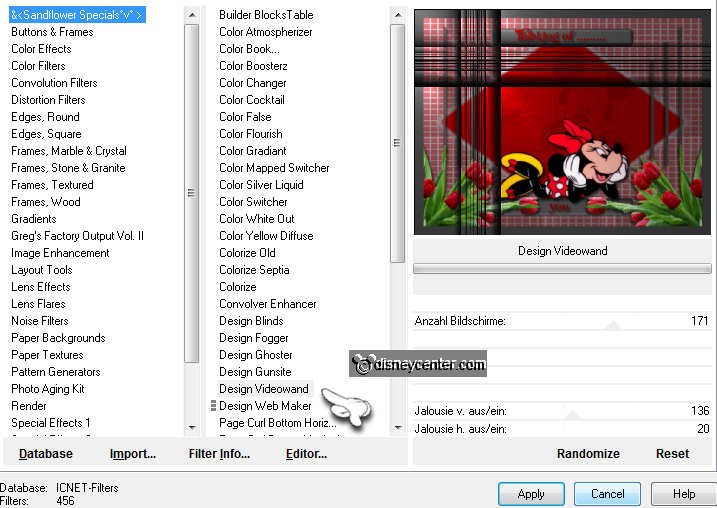
Effects - Filter Unlimited 2.0 - Sandflower Speccials - Design Videowand - with
this setting.
10.
Promote selection to layer
Selections - select none.
Duplicate this layer - image - mirror - image - flip.
Set the opacity of this layer at 50.
Layers -merge - merge down.
Give the same Inner Bevel as in point 5.
11.
Copy the border and paste as a new image. We need that later
Image - add border 5 - background color #8a0000.
Image - add border 20 - foreground color.
Select the border - copy now the border (that we put away) - and paste in
selection.
Selections - select none.
12.
New raster layer - put your watermark into the image.
Layers - merge - merge all visible.
If you do not want to make an animation, save your image.
13.
Open animation Shop.
Copy your image - paste as a new animation.
Duplicate this 2 times (total 3 frames).
Edit - select all.
14.
Open now the blingheartsarrow.
Delete the first frame -
Animation - resize format of the animation with 50%.
Edit - select all.
Edit - copy - click in the first frame of the image - paste into selected frames.
15.
File - save as - give name - click 3 times at next - and then finish.
Ready is the tag
I hope you like this tutorial.
greetings Emmy
Tested by Bep

Tutorial written
12-09-2011

