|

This
Tutorial is copyrighted to the Tutorial Writer, © Emmy Kruyswijk 17-02-2012.
This Tutorial
may
not be forwarded, shared or otherwise placed on any Web Site or group without written
permission from
Emmy Kruyswijk
At all Disney creations must be copyrighted.
Do you want to link my lessons?
Please send
me a mail.
Needing
1 tube, 1 misted tube, 1 word-art, 1 preset and 1 accent all made by
me.
1 gradient from Nanson you can find her site
here.
I use Double Chocolate download
here.
Materials

Filters:
Alien Skin, VM Extravaganza, Filter Factory
Gallery VM- download here
Put the plug-ins in the folder plug-ins and the gradient in the folder gradient.
Double click the preset Alien Skin (Emmytower), he imports itself in the
plug-in.
Open the tube, misted tube, accent and word-art in PSP.
Tower of Terror
Set the foreground at a light color and the background at a dark color from the
tube.
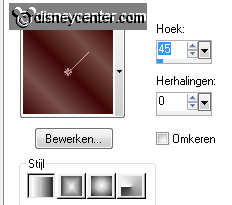
Create a gradient sunburst of the foreground with mqc Double Chocolate.
With this settings.

1. Open new transparent image 800x550.
2. Activate Flood Fill Tool – and fill the image with the
gradient.
3. Layers – duplicate.
4. Image – flip.
5. Set in the layers palette the opacity of the layer at 50.
6. Layers – merge – merge down.
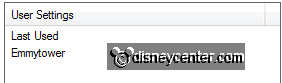
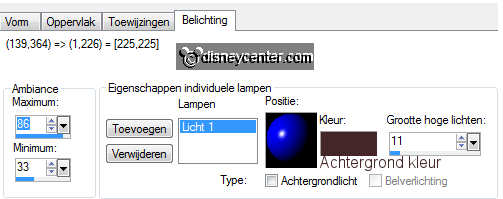
7. Effects – plug-ins – Alien Skin Eye Candy 5 – Textures – Swirl.
Go to settings - User Settings - and click on Emmytower
8. Effects – Edge Effects – enhance.
9. Image – add border – symmetric 2 pixels – foreground color.
10. Window – duplicate or Shift + D
11. Put this image aside, there we go later on.
12. Go further with the original image.
13. Image – resize 85% – all layers checked.
14. Layers – new raster layer.
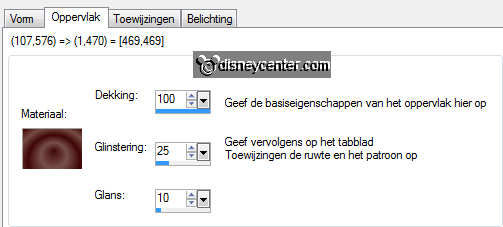
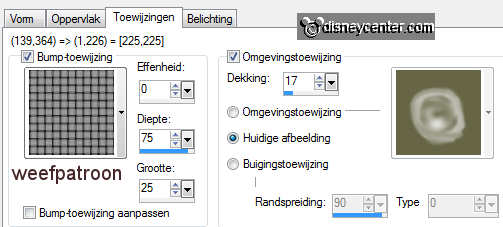
15. Effects – Artistic Effects – Balls and Bubbles.
By Shape – 1single ball or bubble and maximum
possible size checked.
For the next tabs - see the settings below.
16. Image – resize 75% - all layers not checked.
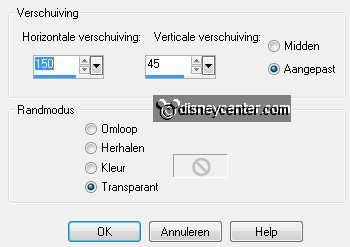
17. Effects – Image Effects – offset – with this settings.
18. Layers – duplicate.
19. Image – resize 25% - all layers not checked.
20. Layers – duplicate and 1 more time.
21. Activate Move tool and move the little balls left from the
large ball - see example.
Activate the top layer.
22. Layers – merge – merge down.
And 1 more time.
23. Activate the bottom layer.
24. Activate selection tool – custom selection.
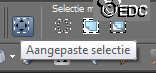
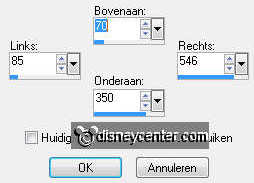
25. Click the custom selection – make a selection with this
settings.
26. Layers – new raster layer.
27. Change the foreground gradient in linear – with this
settings.
28. Activate Flood Fill Tool – and fill the selection with the
gradient.
29. Selections – select none.
30. Effects – plug-ins – VM Extravaganza – Transmission – with
this settings.
31. Effects – Edge Effects – enhance.
32. Activate raster 1.
33. Selections – select all.
34. Selections – float.
35. Selections – defloat.
36. Layers – new raster layer.
37. Activate de misted tube – edit – copy.
38. Edit – paste into selection.
39. Selections – select none.
40. Layers – merge – merge down.
41. Make the top layer active.
42. Activate the accent – edit – copy.
43. Edit – paste as a new layer on the image.
44. Actives Move tool - put this left above – see example.
45. Effects – Edge Effects – enhance.
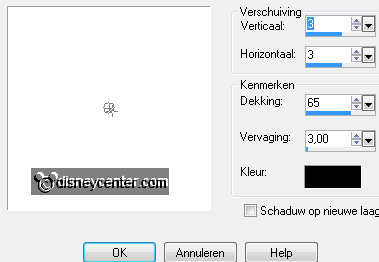
46. Effects – 3D Effects – drop shadow – with this settings.
47. Layers – duplicate.
48. Image – free rotate – left 90.
49. Put this right below.
50. Lock in the layer palette copy of raster 1, by clicking at
the eye.

51. Make the bottom layer active.
52. Layers – merge – merge all visible.
53. Open the bottom layer.
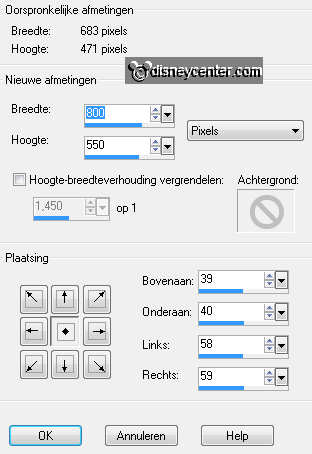
54. Image – canvas size – with this settings.
55. Stay at this layer.
56. Activate the image, that you put aside in point 9.
57. Edit – copy.
58. Edit – paste as a new layer on the original image.
59. Layers – arrange – move down.
60. Activate the merge layer.
61. Effects – 3D Effects – drop shadow – with this settings.
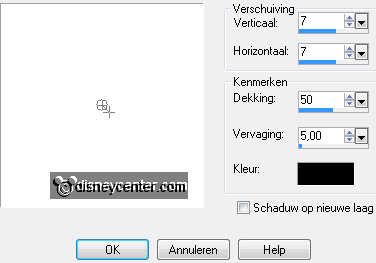
62. Repeat the drop shadow with Horz. and Vert. at -7
63. Make the top layer active.
64. Activate the tube – edit – copy.
65. Edit – paste as a new layer on the image.
66. Put the tube left below.
67. Effects – 3D Effects – drop shadow – with this settings.
68. Activate word-art-tower – edit – copy.
69. Edit – paste as a new layer on the image.
70. Put this right below – see example.
71. Layers – new raster layer.
72. Put your watermark into the image.
73. Lock in the layer palette copy of raster 1 – by clicking at
the eye.
74. Activate the bottom layer.
75. Layers – merge – merge all visible.
76. Actives copy of raster 1 – open this.
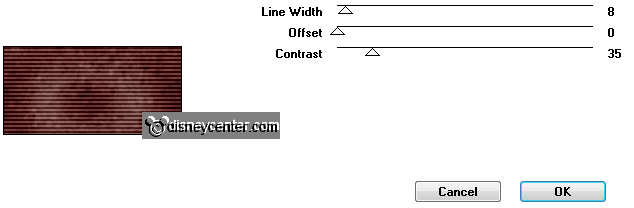
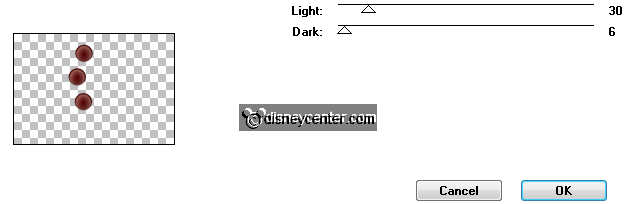
77. Effects – plug-ins – Filter Factory Gallery V – Split
Contrast – with this settings.
78. Edit – copy special – copy merged.
79. Open Animation shop.
80. In AS – paste as a new animation.
81. Back in PSP – click 1 time at Undo Last Command.

82. Effects – plug-ins – Filter Factory Gallery V – Split Contrast –
change only Light in 60
83. Edit – copy special – copy merged.
84. In AS – paste after active frame.
85. Back in PSP - click 1 time at Undo Last Command.
86. Effects – plug-ins – Filter Factory Gallery V – Split Contrast –
change only Light in 90
87. Edit – copy special – copy merged.
88. In AS – paste after active frame. Be sure that the last
frame is selected.
89. Edit – select all.
90. Animation – Frame properties – put this at 45.
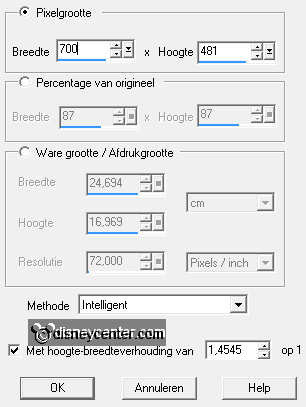
91. Animation – resize format of animation – with this
settings.
92. File – save as – give name – click 3 times at next and than
at finish.
Ready is the tag
I hope you like this tutorial.
greetings Emmy
Tested by Cobie,
Tutorial written 17-02-2012
|