Toy Story
Foreground color #f7cc1a and background color #9b180e.
1.
Open new transparent image 650x450.
Fill this with the background color.
Copy mistedtoy - and paste as a new layer on the image.
2.
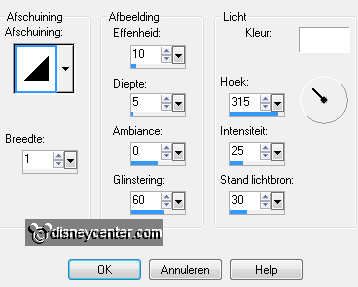
Adjust - Blur - Gaussian Blur at 25.
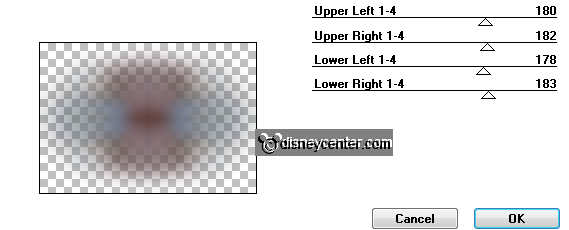
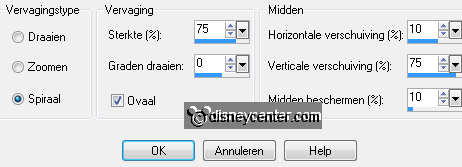
Effects - Mirror Rave - Quadrant Flip - with this setting.
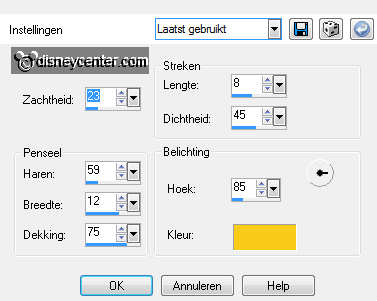
Effects - Art Media effects - Brush strokes - with this setting.
Layers - merge - merge down.
3.
New raster layer - fill this with the foreground color.
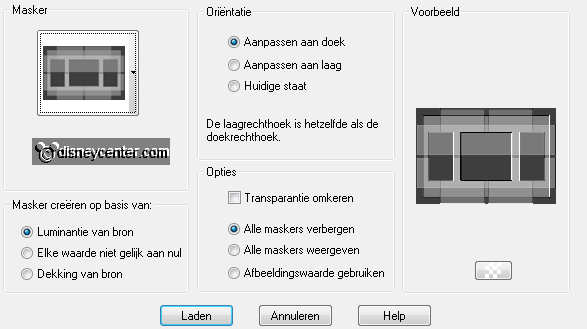
Layers - Load/Save mask - Load mask from disk - look for mask-emmy1-
with this setting.
Layers - merge - merge group.
Effects - 3D Effects - drop shadow - with this setting.

4.
Copy mistedtoy1 and paste as a new layer on the image.
Duplicate this layer - make the original tube layer active.
Adjust - Blur - radial blur - with this setting.
5.
Effects - Distortion effects - Twirl at 75.
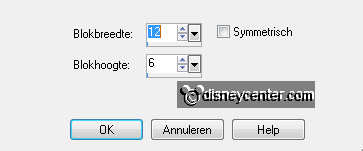
Effects - Distortion effects - Pixelate - with this setting.
Place this to the right.
Duplicate this layer - image - mirror.
Layers - merge - merge down.
6.
Make the top layer active.
Copy Woody and paste as a new layer on the image.
Image - resize 75% - all layers not checked.
Place this at the right side.
Give the same drop shadow as in point 3.
7.
opy Jessie and paste as a new layer on the image.
Place this to the left side.
Give the same drop shadow as in point 3.
8.
Reduce the letters s-t-o-r-y with 50% - all layers checked.
Copy them and paste as a new layer on the image.
Form the word TOY STORY.
Take a free rotate occasionally 5 to the left or right.
Just what you like.
Give them all the same drop shadow as in point 3.
9.
Image - add border 1 pixel - symmetric - background color.
Image - add border 30 pixel - symmetric - color white.
Select the white border with the magic wand - with this setting.

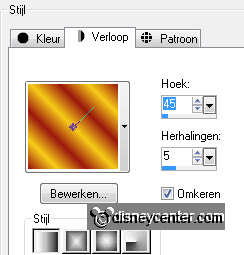
Fill this with gradient linear - with this setting.
10.
Adjust - Blur - Gaussian Blur at 25.
Effects - Texture effects - Blinds - with this setting.
Repeat the Blinds, but now but now with the top tick off.
11.
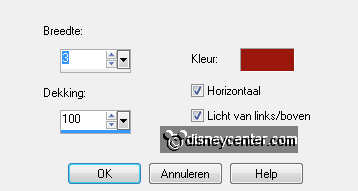
Effects - 3D Effects - Inner Bevel - with this setting.
Selections - select none.
New raster layer - set your watermark into the image.
Layers - merge - merge all.
12.
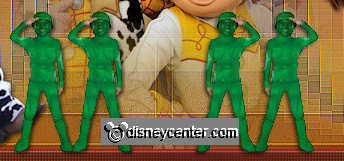
Copy soldaat and paste as a new layer on the image.
Place this before the shoe of Jessie. see example
Duplicate this layer - place it exactly near the other.
Layers - merge - merge down.
13.
Give the same drop shadow as in point 3
Duplicate this layer - image - mirror.
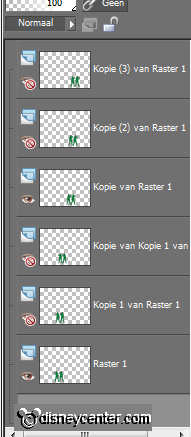
Duplicate the first 2 soldiers (raster1) - rename this layer in copy1
of raster 1.
Duplicate this layer one more time.
14.
Duplicate the mirror soldiers (copy of raster1)
Duplicate this layer one more time.
Put them down so as below.
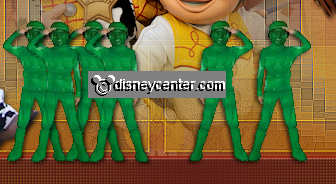
Do this also with the mirror soldiers. It should look like this.
15.
Lock all the layers of the soldiers, except the first layer and
the first mirror layer.
Stay at the bottom layer and open animation shop.
Edit - copy merged.
16.
Back in AS - paste as a new animation.
Back in PSP - Lock the first layers and open the second layers (and
mirror)
Edit - copy merged.
17.
Back in AS - paste after active frame.
Back in PSP - Lock the second layers and open the third layers ( and
mirror)
Edit - copy merged.
18.
Back in AS - paste after active frame. Make sure the last frame
is always selected.
Make frame 1 and 2 active - copy and paste after the third frame.
Make sure now that the last two frames are selected.
Animation - Reverse frames.
19.
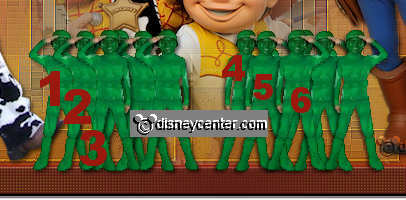
Watch!! The first and the last frames must be the same.
the second and fourth frame also.
You can check this by looking at the shoe of Jessie, to see if the
soldiers stays in line.
Animation - Frame properties - frame 1 and 5 at 75 - frame 2 and 4
at 50 - frame 3 at 150.
File - save as - give name - click 3 times at next and than at
finish.

