1.
Set the foreground color at #bfbfbf and the background
color at #af0904
Open new transparent image - 800x800.
2.
Activate Flood Fill tool - fill this layer with the foreground
color.
Open from scrapkit - folder frames - PK-T-F1.
3.
Edit - copy.
Edit - paste as a new layer on the image.
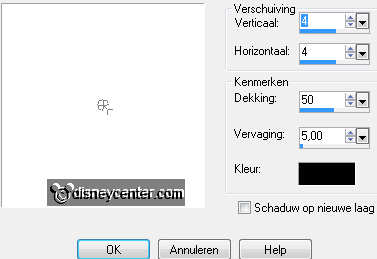
4.
Activate Move tool - move the frame a little up and to the right.
Effects - 3D Effects - drop shadow - with this settings.
5.
Open from scrapkit - folder elements - PK-T-WIRE3.
Edit - copy.
Edit - paste as a new layer on the image.
6.
Place this right above on the frame - see below.
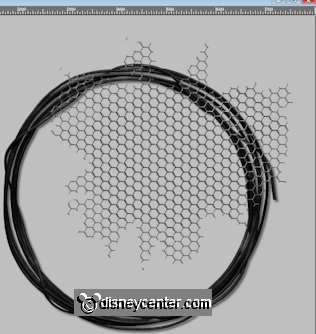
Layers - arrange - move down.
7.
Activate eraser tool - size at 20.
Erase all outside the frame.
8.
Activate the top layer.
Open from the scrapkit (we use now only the folder elements)
PK-T-TRUCK
Edit - copy.
Edit - paste as a new layer on the image.
9.
Effects - Image Effects - offset -
with this settings.
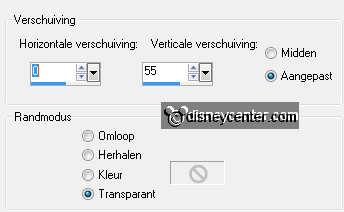
Effects - 3D Effects - drop shadow - settings are right.
10.
Activate gaspump - edit - copy.
Edit - paste as a new layer on the image.
11.
Put this left of the frame - see example.
Effects - 3D Effects - drop shadow -
settings are right.
12.
Open from the scrapkit - PK-T-TYRE - image - resize 50% - all
layers checked.
Edit - copy.
Edit - paste as a new layer on the image.
13.
Place the this before the gaspump right.
Effects - 3D Effects - drop shadow -
settings are right.
14.
Open from the scrapkit - PK-T-HUB -
image - resize 65% - all layers
checked.
Edit - copy.
Edit - paste as a new layer on the image.
15.
Place the hub (dim) before the tyre left - see example.
Effects - 3D Effects - drop shadow -
settings are right.
16.
Open from the scrapkit - PK-T-SIGN2 -
image - resize 85% - all layers
checked.
Activate selection tool - rectangle.
Make a selection as below.
17.
Edit - copy.
Edit - paste as a new image.
Put this aside.
18.
Activate PK-T-SIGN2 - edit - copy.
Edit - paste as a new layer on the image.
19.
Put this right at the top by the frame - see example.
Effects - 3D Effects - drop shadow -
settings are right.
20.
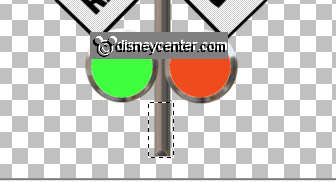
Open from the scrapkit - PK-T-SIGN1 -
image - resize 75% - all layers
checked..
Edit - copy.
Edit - paste as a new layer on the image.
21.
Put the sign under the pole of sign2.
Effects - 3D Effects - drop shadow -
settings are right.
22.
Activate the piece of pole from point 16.
Edit - copy.
Edit - paste as a new layer on the image.
Put this under the sign (sign1). Make sure the equivalent to
the pole.
23.
Open from the scrapkit - PK-T-SIGN3 -
image - resize 50% - all layers
checked.
Edit - copy.
Edit - paste as a new layer on the image.
24.
Put the sign under the pice of pole.
Effects - 3D Effects - drop shadow -
settings are right.
25.
Open uit de scrapkit - PK-T-BARRICADE -
edit - copy.
Edit - paste as a new layer on the image.
26.
Effects - Image Effects - offset -
with this settings.
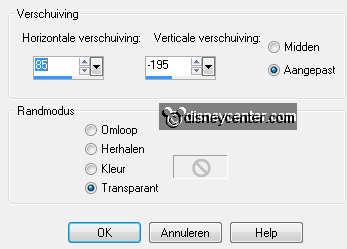
Effects - 3D Effects - drop shadow -
settings are right.
27.
Activate the tube (mictrucker) - edit - copy.
Edit - paste as a new layer on the
image.
28.
Put the tube for the tyre and the barricade - see example.
Effects - 3D Effects - drop shadow -
settings are right.
29.
Open from the scrapkit - PK-T-ROADCONE -
image - resize 50% - all layers
checked.
Edit - copy.
Edit - paste as a new layer on the image.
30.
Put the Roadcone for the barricade right.
Effects - 3D Effects - drop shadow -
settings are right.
31.
Open from the scrapkit - PK-T-TOOLKIT -
image - resize 50% - all layers
checked.
Edit - copy.
Edit - paste as a new layer on the image.
32.
Put the Toolkit left of the roadcone.
Effects - 3D Effects - drop shadow -
settings are right.
33.
Open from the scrapkit - PK-T-GASCAN -
image - resize 75% - all layers
checked.
Edit - copy.
Edit - paste as a new layer on the image.
34.
Zet de Gascan links van de toolkit.
Effects - 3D Effects - drop shadow -
settings are right.
35.
Layers - new raster layer.
Put your watermark into the image.
36.
Make the bottom layer active.
Activate selection tool - rectangle.
37.
Make a selection over the whole image, but stay 40 pixels of the
bottom.
Image - crop to selection.
38.
Selections - select all.
Selections - modify - contract 10
39.
Selections - invert.
Layers - new raster layer.
Fill this with the background color.
40.
Effects - plug-ins - Xero - Fritillary -
with this settings.
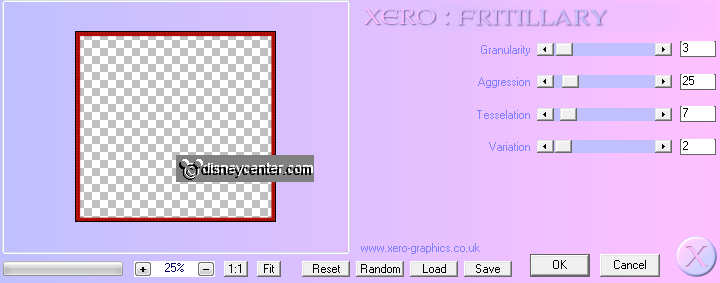
Effects - Edge Effects - enhance.
Selections - select none.
41.
Image - resize 75% - all layers checked.
Activate raster 13 (barricade).
42.
Activate free hand selection tool - point to point.
Make a selection - as below.
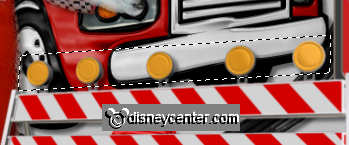
43.
Adjust - Brightness and Contrast - brightness/contrast -
with this settings.
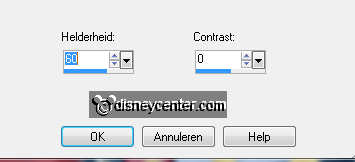
Selections - select none.
44.
Edit - copy merged.
Open animation shop.
45.
In AS - paste as a new animation.
Back to PSP.
Click 3 times at Undo last command.

46.
Edit - copy merged.
In AS - Paste BEFORE active frame.
47.
Edit - select all.
Animations - Frame properties at 40.
File - save as - give name - click 3 times at next and than ata
finish.