Foreground color white and background color #c0c0c0
1.
Open new transparent image 700x500.
Fill this with the background color.
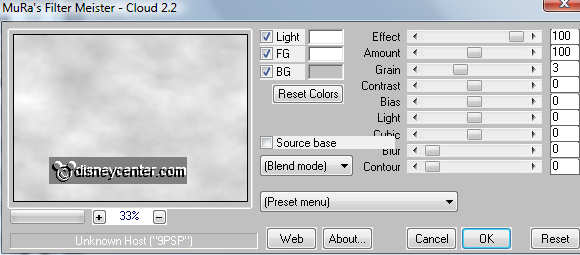
Effects - MuRa's Meister - Clouds - with this setting.
2.
Copy snow2 - paste as a new layer on the image.
Place this left at the bottom.
Duplicate this layer - image - mirror.
Layers - merge - merge down.
3.
Copy snow1 paste as a new layer on the image.
Place this left at the bottom.
Duplicate this layer 2 times and place it near the other.
Layers - merge - merge down 2 times.
4.
Copy christmas3 - paste as a new layer on the image.
Place this in the right upper corner.
Duplicate this layer - set the Blend mode at multiply.
5.
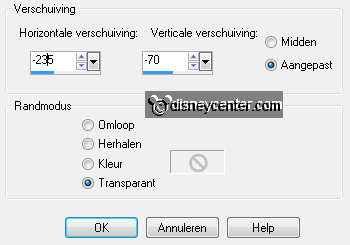
Copy tree - paste as a new layer on the image.
Effects - Image effects - Offset - with this setting.

Copy trees paste as a new layer on the image.
Effects - Image effects - Offset - with this setting.
6.
Make raster 3 active - arrange - bring to top.
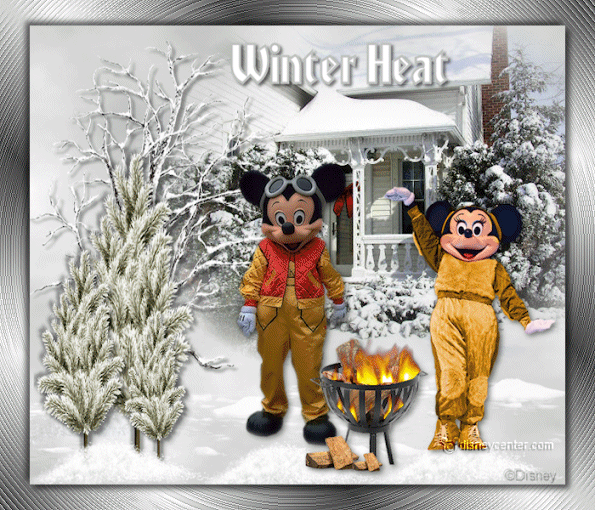
Copy micwintersport paste as a new layer on the image.
Place it as shown in the example.
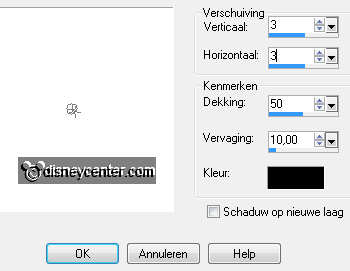
Effects - 3D Effects - drop shadow - with this setting.
7.
Copy minniewintersport paste as a new layer on the image.
Image - resize 90% - all layers not checked.
Place this at the left side - see example.
Give the same drop shadow as in point 6.
8.
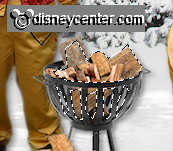
Copy vuurkorf paste as a new layer on the image.
Image - resize 65% - all layers not checked..
Place this between Mickey and Minnie - see example.
Give the same drop shadow as in point 6.
9.
Copy word-art-winterheat paste as a new layer on the image.
Place this in the middle at the top.
Layers - merge - all layers checked.
10.
Convert to raster layer.
Image - resize - 90% - all layers NOT checked.
New raster layer - arrange - send to bottom.
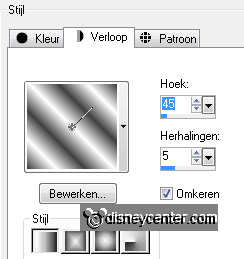
Set the background color at #404040
Fill this with the gradient linear - with this setting.
11.
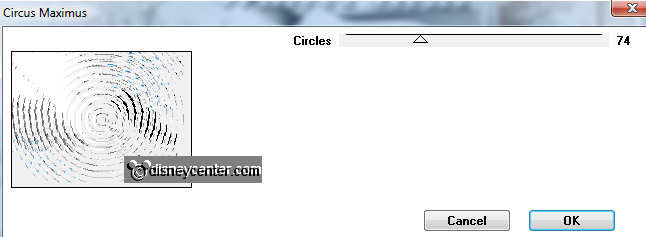
Effects - Funhouse - Circus Maximus - with this setting.
Duplicate this layer - image - mirror - image -
flip.
Set the opacity of this layer at 50.
Layers - merge - merge down.
Effects - Edge Effects - enhance
12.
Make the top layer active.
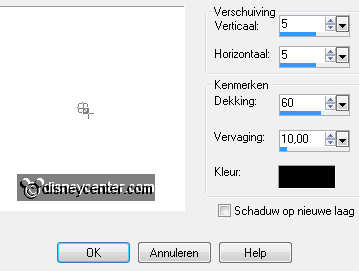
Effects - 3D Effects - drop shadow - with this setting.
Repeat the drop shadow -5.
New raster layer - put your watermark into the image.
Layers - merge - merge down.
13.
Go to Freehand selection tool - point to point - and select the
parts as below.
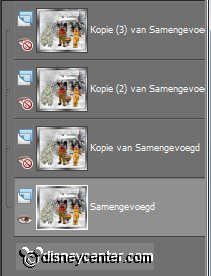
Duplicate this layer 3 times and make the bottom layer active- Lock
the other 3 layers.
Effects - Eye Candy 4000 - Fire - with this setting.
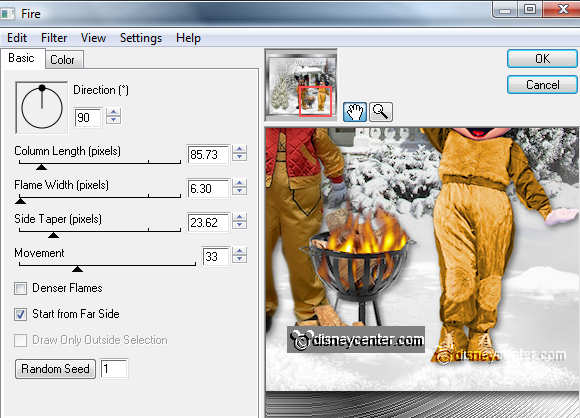
Lock this layer and make the second layer active.
Repeat the Fire -click at random seed.
Lock this layer and make the third layer active.
Repeat the Fire -click at random seed.
Lock this layer and make the fourth layer active.
Repeat the Fire -click at random seed.
Selections - select none
14.
Lock the top 3 layers and open the bottom layer and make this
active.
Edit - Copy - Open animation shop.
In AS - Paste as a new animation
Back in PSP - Lock the first layer and open the second layer and
make this active.
Edit - Copy - In AS - paste after active frame - make sure that the
last frame is selected.
15.
Back in PSP - Lock the second layer and open the third layer and
make this active.
Edit - Copy - In AS - paste after active frame
Back in PSP - Lock the third layer and open the fourth layer and
make this active.
Edit - Copy - In AS - paste after active frame
16.
Edit - select all.
Animation - Frame properties at 20.
Animation - resize format of animation 85% - Maintain aspect ratio
checked.
File - save as - give name - click 3 times at next and than at
finish.