1.
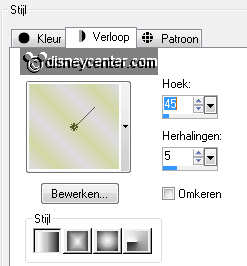
Set in your layer
palette the foreground color at
#dedbe2 and the background color at
#d2d8a4.
Make a foreground gradient linear – with this setting.
2.
Open new transparent image 800x700.
Activate Flood Fill tool – fill the image with the gradient linear.
3.
Adjust – blur – Gaussian blur – radius at 30.
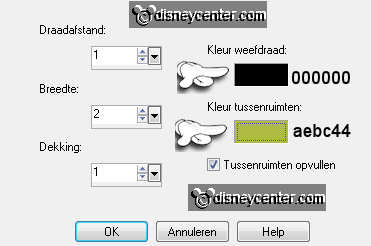
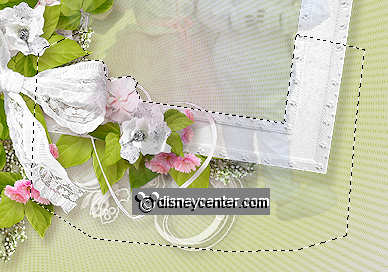
Effects – Texture Effect – Weave – with this setting.
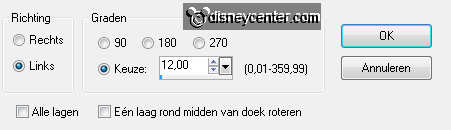
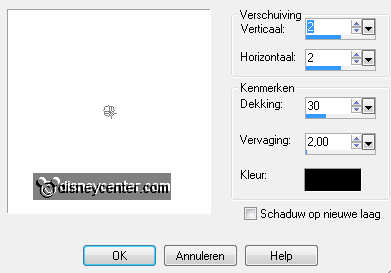
4.
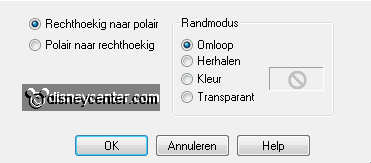
Effects – Distortion Effects – Polar Coordinates – with this
setting.
5.
Open MiMiConcepts-Cluster – image – resize 75% - all layers
checked.
Edit – copy – edit – paste as a new layer on the image.
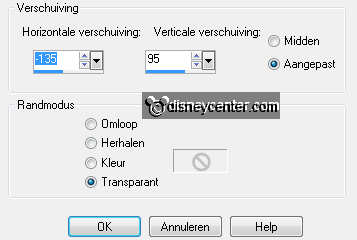
6.
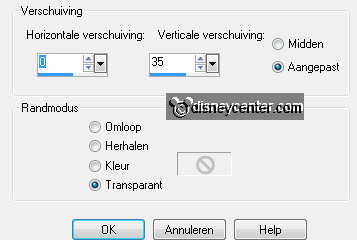
Effects – Image effects – offset – with this setting.
7.
Open from the scrapkit raster1 – Edit – copy – edit – paste as a
new image.
Image – resize 55% - all layers not checked.
8.
Image – free rotate – with this setting.
9.
Edit – copy – edit – paste as a new layer on the image.
Effects – Image effects – offset – with this setting.
10.
Layers – arrange – move down.
Layers – merge – merge down.
11.
Activate free hand selection tool – point to point - make a selection
as below.

Be watch raster 3 is activated – click on the delete key.
12.
Selections – select none.
Effects – 3D Effects – drop shadow – with this setting.

13.
Make the top layer active.
Open your tube – Edit – copy – edit – paste as a new layer on the
image.
14.
Set the opacity of this layer at 20.
Activate free hand selection tool – point to point - make a selection
as below.
15.
Click at the delete key – set the opacity of this layer back to
100.
Selections – select none.
16.
Effects – 3D Effects – drop shadow – settings are right.
Layers – merge – merge down.
17.
Open from the scrapkit element – image – mirror.
Edit – copy.
18.
Edit – paste as a new layer on the image.
Place this left at the bottom.
19.
Open from the scrapkit carte – image – resize 85% - all layers
checked.
Edit – copy – edit – paste as a new layer on the image.
20.
Image – free rotate – left 9.
Place this near the element right – see example.
21.
Open from the scrapkit jartière –
Edit – copy – edit – paste as a new layer on the image.
Place this left at the bottom – before the carte – see example.
22.
Open from the scrapkit alliances – Edit – copy – edit – paste as a
new layer on the image.
Place this left of the jartière.
23.
Lock the 2 bottom layers and activate 1 of the others.
Layers – merge – merge all visible.
Effects – 3D Effects – drop shadow – with this setting.
24.
Move the merge layer a little to the right 60 pixels from the
side.
Open the 2 bottom layers.
25.
Open from the scrapkit voiture – image – mirror.
Edit – copy – edit – paste as a new layer on the image.
26.
Place this right at the bottom – see example.
Effects – 3D Effects – drop shadow – with this setting.
27.
Open MiMi-Consept – image – mirror.
Edit – copy – edit – paste as a new layer on the image.
28.
Place this at the voiture at the front – see example.
Effects – 3D Effects – drop shadow – settings are right.
Layers – merge – merge down.
29.
Open from the scrapkit coin diamant – Edit – copy – edit – paste
as a new layer on the image.
Place this right at the top of the left frame.
30.
Image – free rotate - left 9.
Effects – 3D Effects – drop shadow – settings are right.
31.
Duplicate this layer – image – mirror.
Place this left of the left frame.
32.
Image – free rotate – left 19.
Layers – merge – merge down.
33.
Open word-art Wedding – Edit – copy – edit – paste as a new
layer on the image.
Place this right at the top - above the right frame.
34.
New raster layer – set your name or watermark into the image.
Layers – merge – merge all.
35.
Image – add border 2px – symmetric – color #9fb128
Image – add border 4px – symmetric – foreground color
Image – add border 2px – symmetric – color #9fb128
36.
Effects – plug-in – AAA Frames – Foto Frames – with this setting.
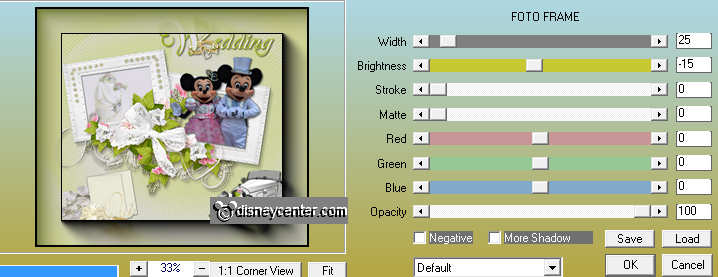
Image – resize – 75% - all layers checked.
37.
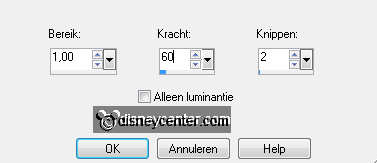
Adjust – sharpness – Unsharp mask – with this setting.
File – export – JPEG Optimizer.
Ready is the tag
I hope you like this tutorial.
greetings Emmy
Tested by Cobie

