7.
Layers- new raster layer.
Fill with the flood fill tool the selection with the background
color.
Selections – select all.
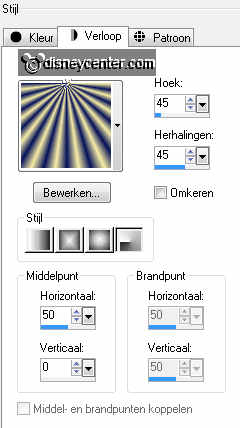
Selections – modify – contract 55.
8.
Layers – new raster layer.
Fill with the flood fill tool the selection with the background
color.
Set in the layer palette the opacity of this layer at 75.
9.
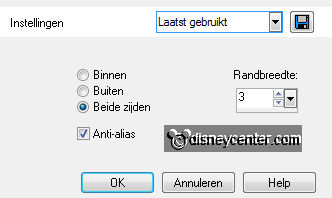
Selections – modify – select selection borders - with this
setting.
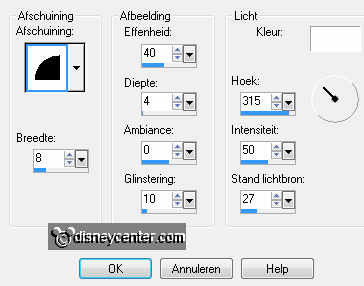
Fill with the flood fill tool the selection with the foreground color.
Effects – 3D Effects – inner bevel – with this setting
Selections – select none.
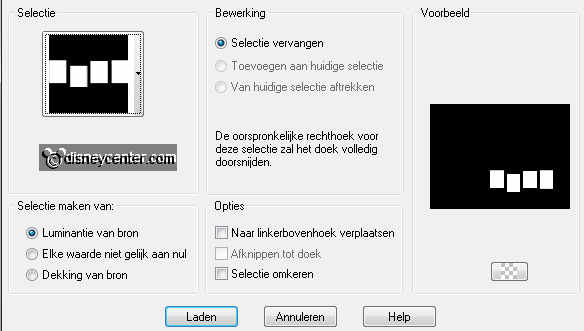
10.
Selections – load/save selection – load selection from disk –
look Emmyaladdin – with this setting.
Layers - new raster layer.
Fill with the flood fill tool the selection with the foreground color.
11.
Selections – modify – contract 2.
Fill with the flood fill tool the selection with the background
color.
Selections – select none.
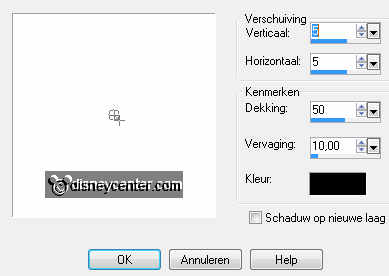
Effects – 3D Effects – drop shadow – with this setting.
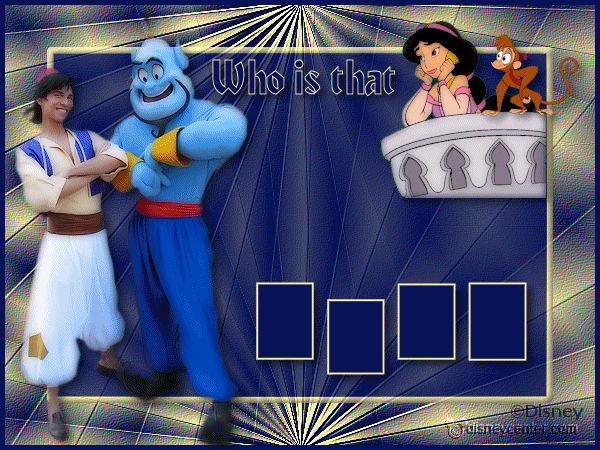
12.
Activate the tube aladdin – edit - copy.
Edit – paste as a new layer on the image.
Move the tube with the move tool to the left side.
Effects – 3D Effects – drop shadow – settings are right.
13.
Activate the tube jasmine – edit - copy.
Edit – paste as a new layer on the image.
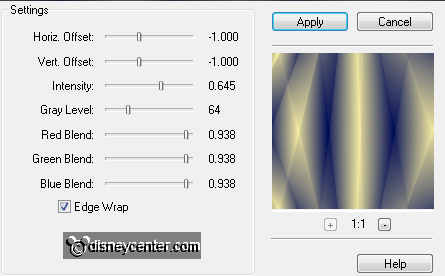
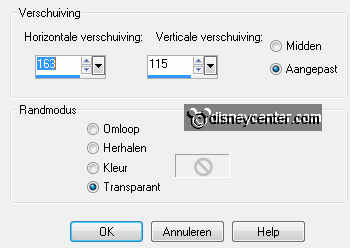
Effects – Image effects – offset – with this setting.
14.
Effects – plug-ins – Xero – Porcelain – with this setting.
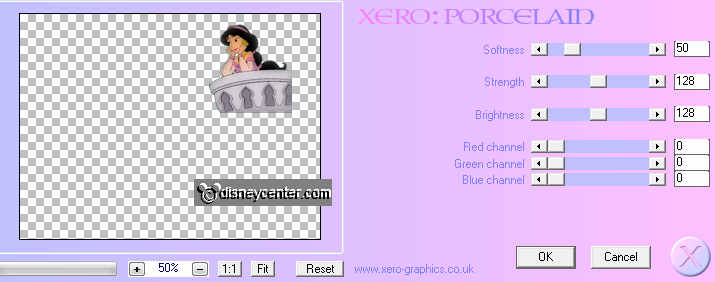
Effects – 3D Effects – drop shadow – settings are right.
15.
Activate text tool –with this setting.

Write - Who is that – convert to raster layer.
Effects – 3D Effects – drop shadow – settings are right.
16.
Layers – new raster layer – put your watermark into the image.
Layers – merge – merge all.
17.
Activate the tube Abu – edit - copy.
Edit – paste as a new layer on the image.
Effects – 3D Effects – drop shadow – settings are right.
Move the tube with the move tool near Jasmine right.
18.
Layers – duplicate.
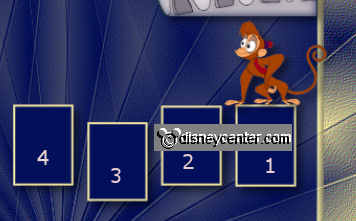
Put the tube with move tool on the box right (1)– see below.
19.
Layers – duplicate.
Put the tube with move tool on the box there beside. (2)
20.
Layers – duplicate.
Put the tube with move tool on the box there beside. (3)
21.
Layers – duplicate.
Put the tube with move tool on the box there beside. (4)
22.
Layers – duplicate.
Image - mirror.
Put the tube with move tool on the box back. (3)
23.
Layers – duplicate.
Put the tube with move tool on the box back. (2)
24.
Layers – duplicate.
Put the tube with move tool on the box back. (1)
25.
Lock in the layer palette the top 7 layers.
Activate the bottom layer – edit – copy special – copy merged.
26.
Open Animatie Shop –edit – paste as a new animation.
Back in PSP – lock in the layer palette raster9 and open copy of raster9.
Edit – copy special – copy merged.
27.
In AS – paste after active frame.
Back in PSP – lock in the layer palette copy of raster9 and
open copy(2) of raster9.
28.
In AS – paste after active frame.
Back in PSP – lock in the layer palette copy(2) of raster9 and open
copy(3) of raste9.
29.
In AS – paste after active frame.
Back in PSP – lock in the layer palette copy(3) of raster9 and
open copy(4) of raster9.
30.
In AS – paste after active frame.
Back in PSP – lock in the layer palette copy(4)of raster9 and
open copy(5) of raster9.
31.
In AS – paste after active frame.
Back in PSP – lock in the layer palette copy(5) of raster9 and
open copy(6) of raster9.
32.
In AS – paste after active frame.
Back in PSP – lock in the layer palette copy(6) of raster9 and open
copy(7) of raster9.
33.
You have now 8 frames
Edit - select all.
Animations – Frame Properties 75 – change the first and the fifth frame in 150.
34.
File – save as – give name – click 3 times at next and than at
finish.
Ready is the tag
I hope you like this tutorial.
greetings Emmy
Tested by Cobie.

Tutorial written 20-04-2012