Foreground color #9fbcc6 and background color white.
1.
Open new transparent image 700x700.
Fill this with the background color.
Go to Preset Shape Tool - eclips - turn the colors and lock the
foreground (white ).
Make a circle in the middle from 400x400.
Objects - Align - center in Canvas.
Convert to raster layer.
2.
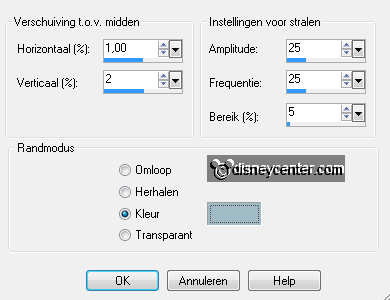
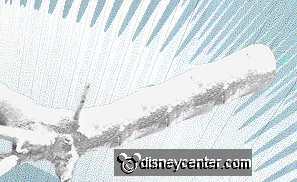
Effects - Distortion Effects - Spiky Halo - with this setting.
Duplicate this layer.
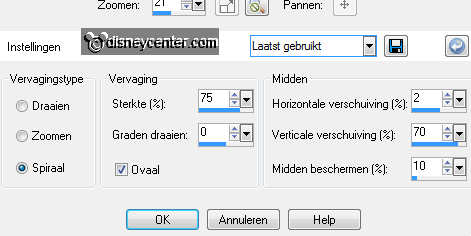
Adjust - Blur - radial blur - with this setting.
3.
Effects - Edge Effects - enhance more.
Repeat Edge Effects - enhance.
Open from the scrapkit Winter Magic by_Mago74 el(23) - image -
resize 25% - all layers checked.
Copy this and paste as a new layer on the image.
4.
Place this at the top in the middle.
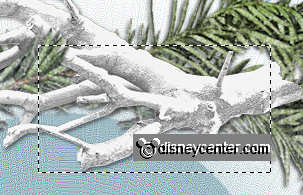
Go to selection tool - rectangle - and make a selection of this part.
see below.
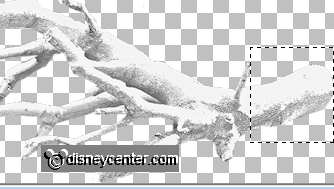
Copy - paste a a new layer on the image.
Place this at the stump of the branch, make sure that he is equal.
5.
Duplicate this layer - and place again at the stump of the
branch.
Layers - merge - 2 times merge down.
Place this now totally right at the top.
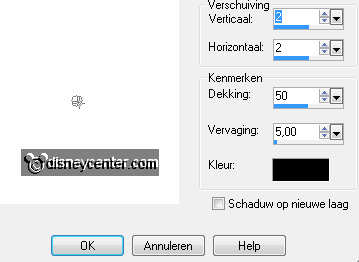
Effects - 3D Effects - drop shadow - with this setting.
6.
Open Winter Magic by_Mago74 el(71) - image -
resize 50% - all layers checked.
Copy this and paste as a new layer on the image.
Image - mirror - image - flip.
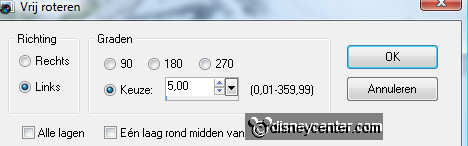
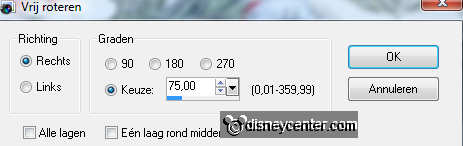
Image - free rotate - with this setting.
Layers - arrange - move down.
7.
Give the same drop shadow as in point 5.
Duplicate this layer - image - mirror.
Duplicate this layer - Layers - arrange - move up.
Stay at the top layer.
8.
Go to selection tool - rectangle - and make a selection as below.
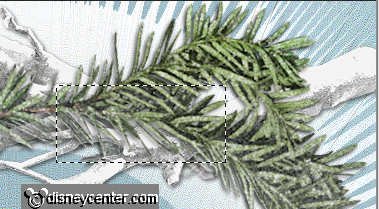
Click at the delete key - selections - select none.
Erase now the rest of the pine needles at the stem. see example.
9.
Open Winter Magic by_Mago74 el(1) - image -
resize 20% - all layers checked.
Copy this and paste as a new layer on the image.
Place this at the stump right. About 30 pixels from the side.
Give the same drop shadow as in point 5.
Layers - arrange - move down twice.
10.
Stay at the top layer.
Open Winter Magic by_Mago74 el(31) - image -
resize 15% - all layers checked.
Copy this and paste as a new layer on the image.
Place this left on the Christmas branch.
Give the same drop shadow as in point 5.
11.
Activate copy of raster2.
Open Winter Magic by_Mago74 el(10) - image -
resize 75% - all layers checked.
Copy this and paste as a new layer on the image.
Give the same drop shadow as in point 5.
12.
Activate raster 3 - copy micgoofykerst and paste as a new layer
on the image.
Give the same drop shadow as in point 5..
Duplicate this layer- move 1 tube layer UNDER the star layer.
13.
Stay at the top tube layer and erase the right leg of Goofy. see
below.
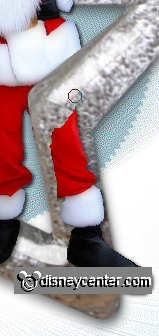
Stay at the bottom tube layer and erase the rest of the leg outside
the star.
If not everything is equally done, switching the tube layers .
14.
Stay at the top tube layer and erase the left leg of Mickey.
Open Winter Magic by_Mago74 el(17) - image -
resize 20% - all layers checked.
Copy this and paste as a new layer on the image.
15.
Place this left at the bottom.
Give the same drop shadow as in point 5.
Image - free rotate - with this setting.
16.
Open Winter Magic by_Mago74 el(14) - image -
resize 25% - all layers checked.
Copy this and paste as a new layer on the image.
Place this below the white branch.
Give the same drop shadow as in point 5.
17.
Open Winter Magic by_Mago74 el(29) - image -
resize 25% - all layers checked.
Copy this and paste as a new layer on the image.
Place this left at the bottom - Layers - arrange - move down.
Give the same drop shadow as in point 5.
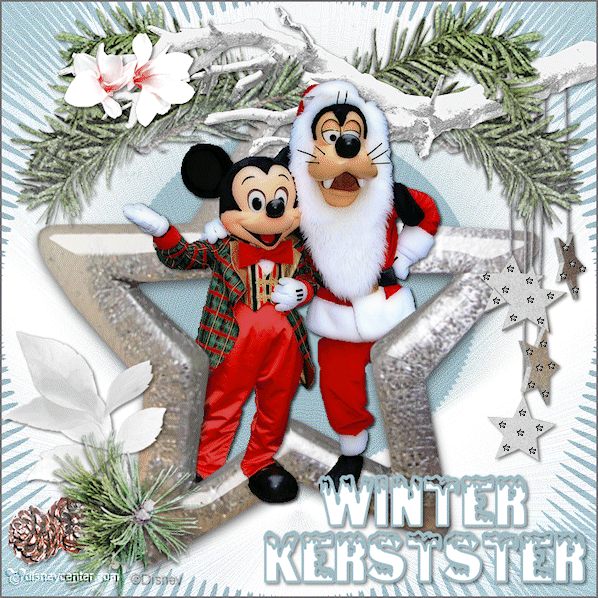
18.
Copy word-art Winterkerstster and paste as a new layer on the
image.
Place this at the bottom right.
New raster layer - put your watermark into the image.
19.
Image - add border 2 pixels - color #757575.
Image - resize 85% - all layers checked.
Copy the image and open animation shop.
20.
In AS - paste as a new animation.
Edit - duplicate selection - Edit - select all.
Open glitter - edit - select all.
Copy and paste into selected frames.
Paste this on the little stars. Or where you like it.
21.
You only need to do to the other times
- paste into selected
frames. Again and again.