1.
Open your image - do Shift+D - and minimize the original image.
We go further with the copy.
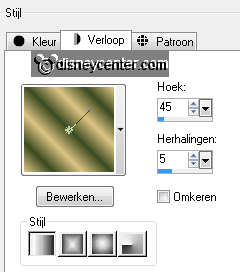
Set the foreground at a light color from the image and the
background at a dark color from the image.
Make a foreground gradient of this - linear with this setting.
2.
Image - add border 3px - symmetric - color white.
Activate the magic wand and select the white border.

3.
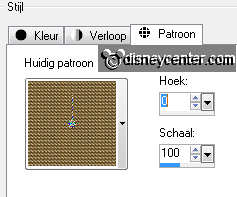
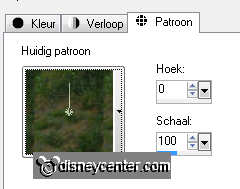
Set the background at pattern - angle 0 - scale 100
Activate Flood Fill Tool and fill this with gold pattern.
4.
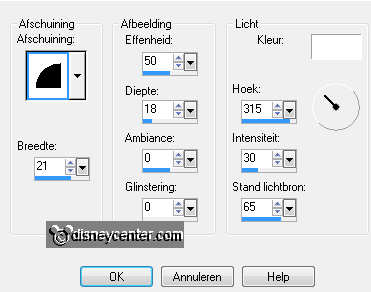
Effects - 3D Effects - Inner Bevel - with this setting.
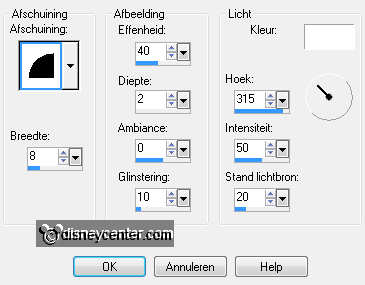
Selections - select none.
5.
Image - add border 15px - symmetric - color white.
Set the foreground at gradient.
Select with the magic wand the white border - fill this with the
gradient.
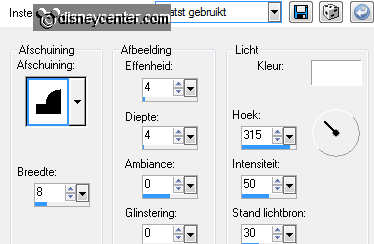
Give the same Inner Bevel as in point 2.
Selections - select none.
6.
Image - ad border 3px - symmetric - color white.
Select with the magic wand the white border - fill this with gold
pattern.
Give the same Inner Bevel as in point 2.
Selections - select none.
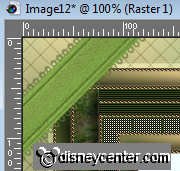
7.
Image - add border 15px - symmetric - background color.
Select with the magic wand the border.
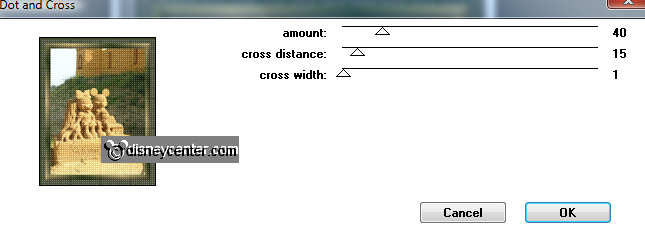
8.
Effects - plug-ins - Penta.com - Dot and Cross - with this
setting.
9.
Effects - Edge Effects - enhance.
Selections - select none.
10.
Image - ad border 3px - symmetric - color white.
Select with the magic wand the white border - fill this with gold
pattern.
Give the same Inner Bevel as in point 2.
Selections - select none.
11.
Image - add border - symmetric not checked - background color - with this setting.
Select the borders with the magic wand.
12.
Effects - Texture Effects - Blinds - with this setting.

Selections - select none.
13.
Image - add borders top and bottom 3px - others at 0 - symmetric not
checked - color white.
Select with the magic wand the white borders - Fill this with the
gold pattern.
Give the same Inner Bevel as in point 2 2.
Selections - select none.
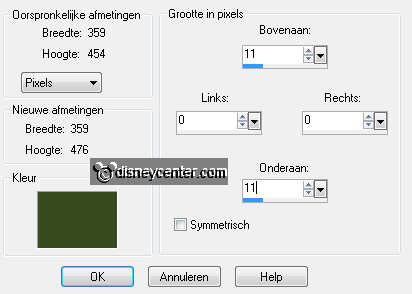
14.
Image - add border top and bottom 11px - others at 0
- symmetric not checked - background color.
Select the borders with the magic wand.
Effects - Texture Effects - Blinds - settings are right.
Selections - select none.
15.
Activate the original image.
Activate selection tool - rectangle - and make a selection for a
pattern - as below.
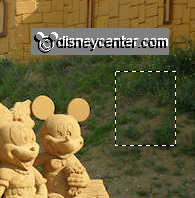
Edit - copy - edit - paste as a new image.
Set the background on this pattern.
Here stays the name of the picture
16.
Image - add border - left and right 25px - others at 0 - symmetric
not checked - color white.
Select with the magic wand the white borders - fill this with the
pattern you just made.
Effects - 3D Effects - Inner Bevel - with this setting.
Selections - select none.
17.
Image - ad border 3px - symmetric - color white.
Set the background back to gold pattern.
Select with the magic wand the white border - fill this with gold
pattern.
18.
Effects - 3D Effects - Inner Bevel - with this setting.

Selections - select none.
19.
Image - add border 15px - symmetric - color white.
Select with the magic wand the white border - fill this with the
gradient.
20.
Effects - 3D Effects - Inner Bevel - setting is right.
Selections - select none.
21.
Image - ad border 3px - symmetric - color white.
Select with the magic wand the white border - fill this with gold
pattern.
Give the same Inner Bevel as in point 2.
Selections - select none.
22.
Image - add border 30px - symmetric - color white.
Select with the magic wand the white border- fill this with the
gradient.
23.
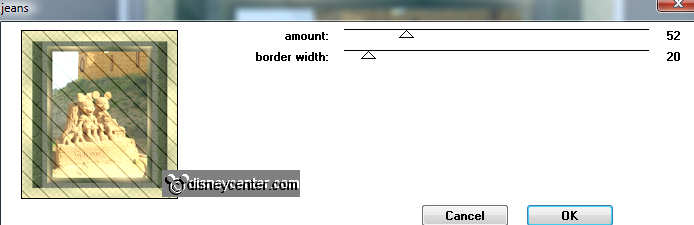
Effects - plug-ins - Penta.com - Jeans - with this setting.
In your layer palette - Promote selection to layer.
Selections - select none.
24.
Image - mirror - set in your layer palette the opacity at 50.
Layers - merge - merge down.
25.
Selections - select all - selections - modify - contract 30
Effects - 3D Effects - Outer Bevel - with this setting.
Selections - select none.
26.
Open RibbonsLooped-LM - edit - copy - edit - paste as a new
layer on the image.
Eventual colorized if you need. (Adjust - Hue and Saturation -
colorized)
Image - free rotate - 45 left.
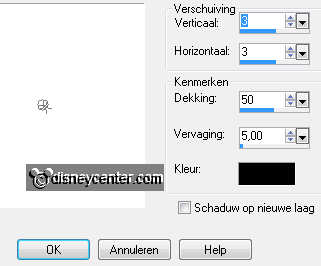
Effects - 3D Effects - drop shadow - with this setting.
27.
Activate Move Tool - move this in the left upper corner.
Layers - duplicate - image - mirror.
Layers - duplicate - image - flip.
Layers - duplicate - image - mirror.
28.
Image - ad border 3px - symmetric - color white.
Select with the magic wand the white border - fill this with gold
pattern.
Give the same Inner Bevel as in point 2.
Selections - select none.
29.
Image - add border 30px - symmetric - color white.
Select with the magic wand the white border - fill this with the
pattern from the image (point 8).
Effects - 3D Effects - Inner Bevel - with the same setting as in
point 8.
Selections - select none.
30.
Image - ad border 3px - symmetric - color white.
Select with the magic wand the white border - fill this with gold
pattern.
Give the same Inner Bevel as in point 2.
Selections - select none.
31.
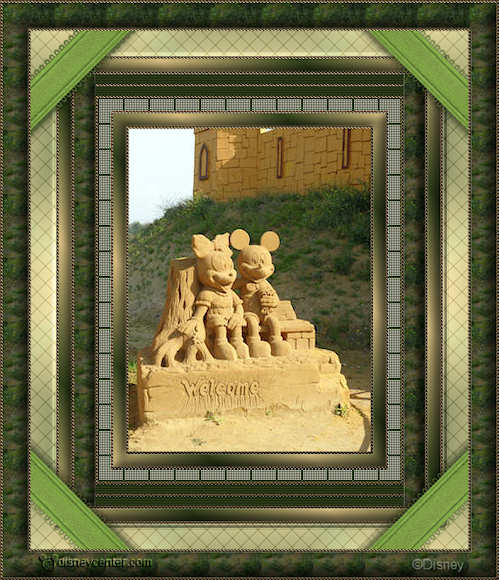
New raster layer - set your name or watermark
into the image.
Layers - merge - merge all.
Image - resize 85% - all layers checked.
File - export - JPEG optimizer.